Sparks for Teams User Manual
Version: 0.1.0
Last Updated: August 2026
Language / Sprache: Deutsch
Table of Contents
- Introduction
- Getting Started
- Platform-Specific Features
- Main Features
- Chat & Messaging
- Spaces
- User Profiles
- Presence and status (detailed)
- Calendar
- Planner & Tasks
- Contacts
- Teams & Channels
- Calls
- Settings
- Security & Encryption
- Accessibility
- Keyboard Shortcuts
- Troubleshooting
Introduction
SPARKS is a unified communication and collaboration platform that combines Matrix chat, Microsoft Teams integration, calendar management, task planning, and video calling in one application.
Key Features
- Matrix Chat: End-to-end encrypted messaging with Matrix protocol
- Advanced Search: Powerful search with filters (date, sender, room, file type)
- Spaces: Organize rooms with hierarchical spaces
- User Profiles: Status messages and profile management
- Microsoft Teams Integration: Access Teams chats and channels
- AI Assistant: AI chat for calendar, contacts, tasks, chats (Matrix, Microsoft Teams), and room files (Sparks Cloud / WebDAV, including keyword search); models chosen from the team allowlist (Account → Team → AI models); optional personal memory; external clients via Account AI access / MCP
- Activity: Unified feed for mentions, messages, calendar, Teams, and connected storage (WebDAV), driven by notification settings
- Calendar: Microsoft, Sparks Scheduler appointments, Google, Nextcloud (CalDAV), Open-Xchange; Outlook add-in for meetings and events directly in Outlook
- Contacts: People from Microsoft, Nextcloud (CardDAV), Open-Xchange, Google (when enabled)
- Planner: Task management (Microsoft Planner, Nextcloud, Open-Xchange, Google when enabled)
- Video Calls: Integrated video calls and meetings in SPARKS
- Automatic Encryption: Automatic setup of encryption, cross-signing, and key backup (recovery key policy depends on your organization)
- Cross-Platform: Available as a desktop app (Windows, macOS, Linux), mobile app (iOS/Android), and in the browser
Getting Started
Beta: Main app https://preview.sparks.team, account https://account-preview.sparks.team. After beta:
app.sparks.teamandaccount.sparks.team.
New to Sparks? Most users start with Self-registration in the Account area: create your email, password, login, and organization, then confirm your email before signing in to Sparks.
Create your account (self-registration)
- Open https://account-preview.sparks.team → Sign up
- Four steps: email → name & password → login → organization name → Complete
- Open the confirmation email and click the link
- Sign in with your login and password
Full guide (German): Selbstanmeldung im Account-Bereich
Sign in to Sparks
-
Launch the application
- Desktop: double-click the Sparks app icon
- Web: open https://preview.sparks.team in your browser
📸 Screenshot:
-
Sign in with the login and password from self-registration (organization account). You can connect Microsoft or other services later under Settings → Provider Accounts & Organisations.
Chat history: In typical setups you sign in with your organization account; the app connects to the Matrix homeserver your operator configured. Existing rooms and message history appear automatically after sync—there is no separate “import chats” step. You need the same Matrix identity as before (same
@user:server). -
Initial setup
- Encryption is set up automatically in the background
- Encryption is set up automatically; optional welcome dialog, Getting started checklist, and app tour — see Getting started & onboarding. In the desktop app, device permissions (camera, microphone, …) come first.
📸 Screenshot: Initialization screen
Interface Overview
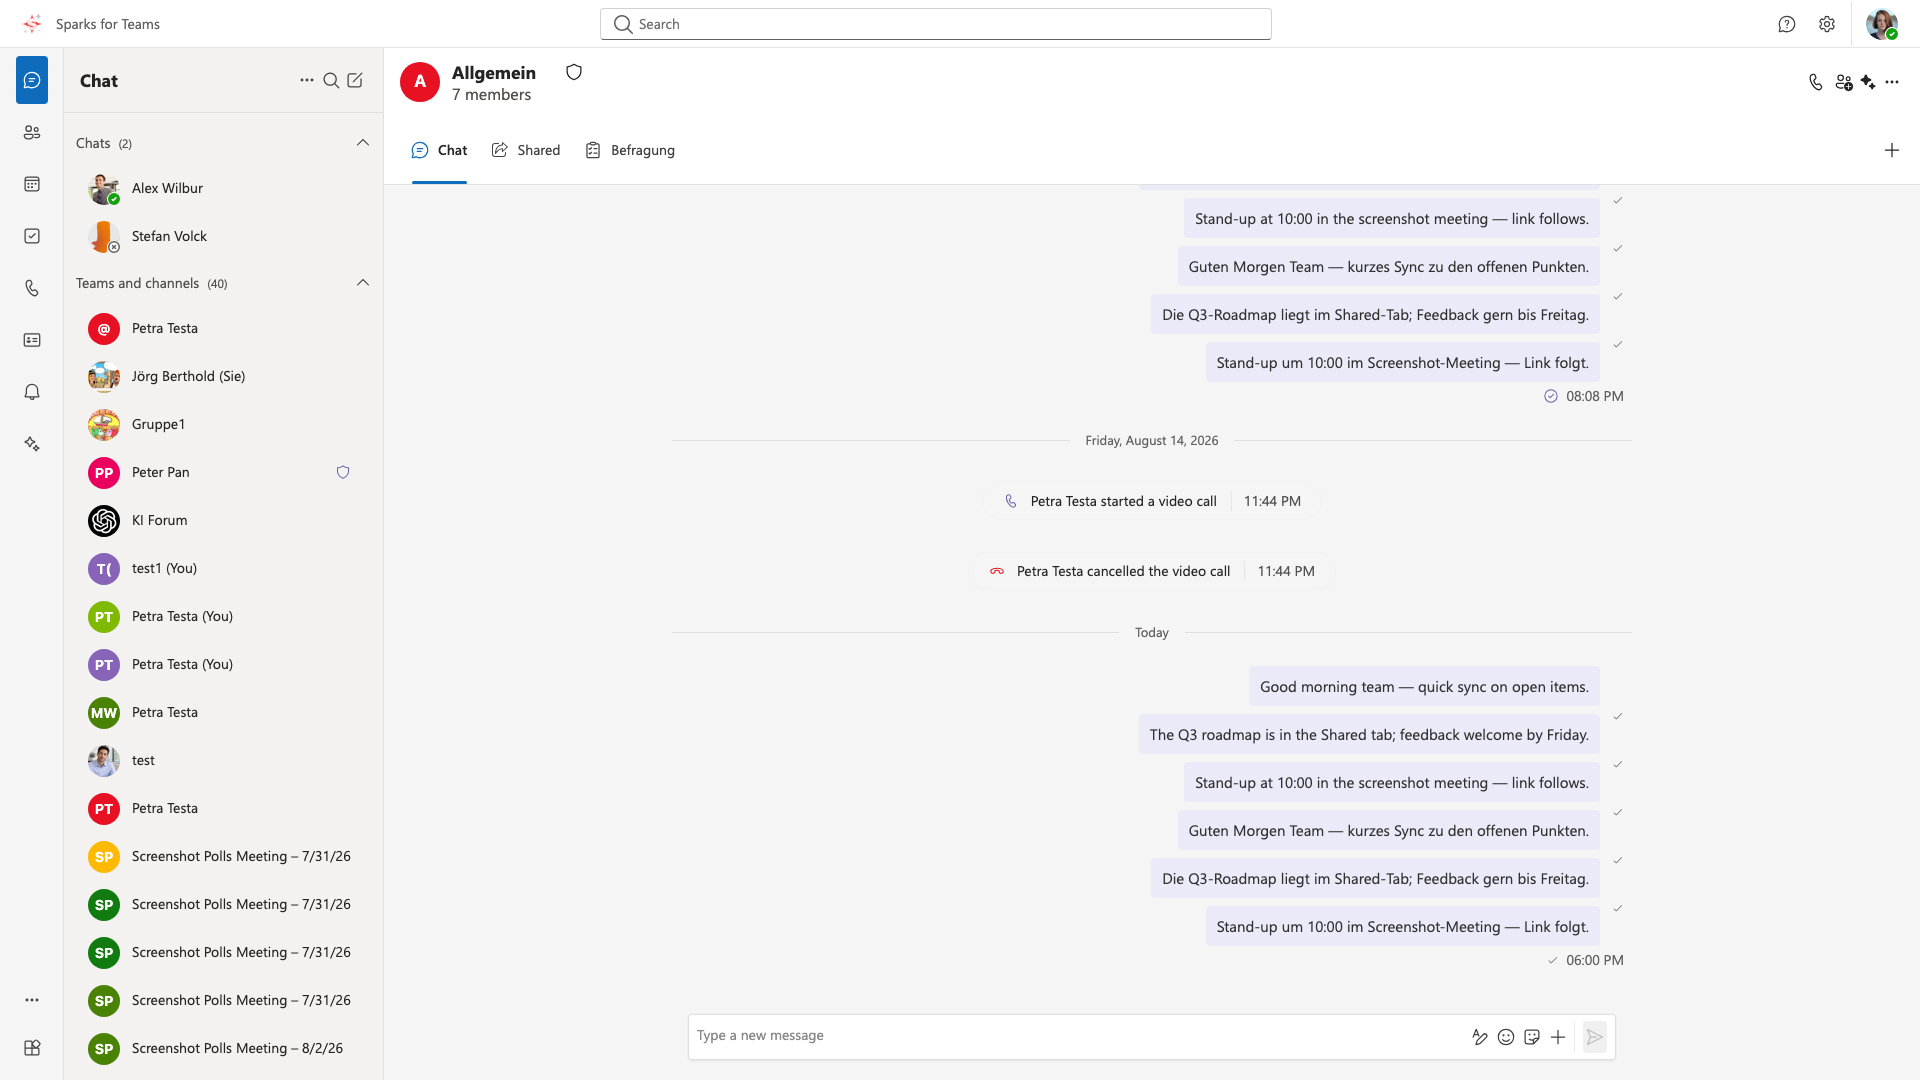
The SPARKS interface consists of:
-
Top Toolbar: Window controls, search, notifications, and user menu
-
Sidebar: Navigation between different sections (Chat, Calendar, Teams, etc.)
-
Main Content Area: Displays the active section's content
-
Mobile Bottom Navigation: On mobile devices, quick navigation bar at the bottom
📸 Screenshot:
Platform-Specific Features
SPARKS is available on multiple platforms, each with platform-specific features and optimizations.
Desktop App (Windows, macOS, Linux)
The desktop app provides native desktop integration and enhanced features.
Installation
Windows:
- Download the
.exeinstaller from the SPARKS website - Run the installer
- Follow the installation wizard
- Launch SPARKS from the Start menu or desktop shortcut
macOS:
- Download the
.dmgfile from the SPARKS website - Open the
.dmgfile - Drag SPARKS to your Applications folder
- Launch SPARKS from Applications (you may need to allow it in System Settings > Privacy & Security)
Linux:
- Download the
.AppImageor.debpackage - For
.deb: Install usingsudo dpkg -i sparks.deb - For
.AppImage: Make executable (chmod +x sparks.AppImage) and run - Launch SPARKS from your applications menu
Desktop-Specific Features
- Native Window Controls: Standard minimize, maximize, and close buttons
- System Tray Integration: Access SPARKS from the system tray (if enabled)
- Notifications: Teams-style in-app toasts for messages and meeting reminders; overlay window when the desktop app is in the background (Tauri). Incoming Sparks calls: separate call window — see Incoming call
- File System Access: Enhanced file handling with native file dialogs
- Keyboard Shortcuts: Broad keyboard navigation; customize shortcuts in Settings
- Deep Linking: Support for custom URL schemes (e.g.,
sparks://) - Auto-Start: Option to launch on system startup
- Meeting window: Meetings can run in a separate window (“Meeting: …”); optional Keep meeting window on top. Additionally a mini window with controls above other apps (including fullscreen presentations).
- Device permissions: Explainer dialog on first launch; later under Settings → General.
Permissions (Desktop)
On first launch the app explains why it needs access; you can tap Later. Denied access does not block the rest of Sparks. Grant later under Settings → General → Device permissions or in system settings.
macOS:
- Microphone: Required for voice calls
- Camera: Required for video calls
- Screen recording: Required to share the screen (can wait until you share)
- First-run explainer, then system dialogs; manage in System Settings > Privacy & Security
Windows:
- Microphone: Required for voice calls
- Camera: Required for video calls
- First-run explainer, then system dialogs; manage in Settings > Privacy > Camera/Microphone
Linux:
-
Permissions depend on your desktop environment
-
Usually handled automatically by the system
📸 Screenshot: Desktop app interface
Mobile App (iOS/Android)
The mobile app provides a native mobile experience optimized for touch interaction.
Installation
iOS:
- Open the App Store on your iPhone or iPad
- Search for "SPARKS" or "Sparks"
- Tap "Get" or "Install"
- Wait for installation to complete
- Launch SPARKS from your home screen
Android:
- Open Google Play Store on your Android device
- Search for "SPARKS" or "Sparks"
- Tap "Install"
- Wait for installation to complete
- Launch SPARKS from your app drawer
Mobile-Specific Features
- Touch-Optimized Interface: Large touch targets and swipe gestures
- Mobile Bottom Navigation: Quick access to main features at the bottom
- Push Notifications: Receive notifications even when app is closed
- Camera Integration: Direct access to device camera for photos/videos
- Biometric Authentication: Face ID / Touch ID / Fingerprint support (if enabled)
- Haptic Feedback: Tactile feedback for interactions
- VoiceOver (iOS) and TalkBack (Android): Labels and semantics for assistive technologies; larger touch targets where possible
- Dynamic Type / system font sizes: Respected where the platform and view allow
- Reduced motion: Where the OS offers “reduce motion”, the app can tone down animations (depends on OS and screen)
- Safe Area Support: Proper handling of notches and safe areas
- Offline Mode: Basic functionality available offline
Mobile Interface Differences
Navigation:
- Bottom navigation bar instead of sidebar (on mobile)
- Swipe gestures for navigation
- Pull-to-refresh for lists
Input:
- Mobile keyboard optimized for messaging
- Voice input support
- Emoji picker optimized for mobile
Media:
-
Direct camera access for photos/videos
-
Native file picker integration
-
Optimized image/video viewing
📸 Screenshot: Mobile app interface
Permissions (Mobile)
iOS:
- Microphone: Required for voice calls
- Camera: Required for video calls
- Notifications: For push notifications
- Photos: For sharing photos (optional)
- Permissions are requested when needed
- Manage in iOS Settings > SPARKS
Android:
- Microphone: Required for voice calls
- Camera: Required for video calls
- Storage: For file sharing (optional)
- Notifications: For push notifications
- Permissions are requested when needed
- Manage in Android Settings > Apps > SPARKS > Permissions
Mobile Accessibility
iOS VoiceOver:
- Built to work with VoiceOver for core flows
- ARIA labels and semantic HTML where applicable
- Touch-optimized targets (minimum 44x44pt where specified by platform guidelines)
- Dynamic Type support
- Reduced Motion support where available
Android TalkBack:
-
Built to work with TalkBack for core flows
-
ARIA labels and semantic HTML where applicable
-
Touch-optimized targets
-
Screen reader navigation patterns
📸 Screenshot: Mobile accessibility features
Web Application
The web application runs in your browser and works on any platform.
Accessing the Web App
- Open your web browser (Chrome, Firefox, Safari, Edge)
- Navigate to the SPARKS web application URL
- Bookmark the page for quick access
- Optionally, add to home screen (mobile browsers)
Web-Specific Features
- No Installation Required: Works immediately in your browser
- Cross-Platform: Works on any device with a modern browser
- Browser Extensions: Can work with browser extensions
- Multiple Tabs: Open multiple SPARKS instances in different tabs
- Browser Sync: Settings may sync across devices (if browser sync is enabled)
Browser Requirements
- Modern Browser: Chrome 90+, Firefox 88+, Safari 14+, Edge 90+
- HTTPS Required: Must be accessed over HTTPS for encryption
- JavaScript Enabled: Required for all functionality
- WebRTC Support: Required for video/audio calls
Web Limitations
- No System Tray: No background operation when browser is closed
- Limited File Access: Browser file picker instead of native dialogs
- Browser Permissions: Depends on browser permission system
- Performance: May be slightly slower than native apps
Web accessibility
-
Keyboard: Use Tab / Shift+Tab to move focus; activate controls with Enter or Space where supported
-
Screen readers: Behavior depends on the browser and its support for ARIA roles, names, and focus management—use an up-to-date browser
-
Zoom: Browser page zoom and OS display scaling apply to the whole UI
📸 Screenshot: Web application interface
Platform Comparison
| Feature | Desktop | Mobile | Web |
|---|---|---|---|
| Native Notifications | ✅ | ✅ | ⚠️ (Browser-dependent) |
| System Tray | ✅ | ❌ | ❌ |
| Background Operation | ✅ | ✅ | ❌ |
| File System Access | ✅ | ⚠️ (Limited) | ⚠️ (Limited) |
| Keyboard Shortcuts | ✅ | ❌ | ✅ |
| Touch Gestures | ❌ | ✅ | ⚠️ (Touch devices) |
| Offline Mode | ⚠️ (Limited) | ⚠️ (Limited) | ❌ |
| Auto-Start | ✅ | ⚠️ (OS-dependent) | ❌ |
| Deep Linking | ✅ | ✅ | ⚠️ (Browser-dependent) |
Choosing the Right Platform
Use Desktop App if:
- You want native desktop integration
- You need system tray notifications
- You want keyboard shortcuts
- You prefer native file dialogs
Use Mobile App if:
- You're primarily on mobile devices
- You need push notifications
- You want touch-optimized interface
- You need offline access
Use Web App if:
- You want no installation
- You need cross-platform access
- You're on a shared/public computer
- You want to test before installing
Accessibility
SPARKS is designed to work well with keyboard input, common screen readers, and operating-system assistive features. What you experience depends on platform, browser, plan, and sometimes tenant configuration.
| Topic | Where to look in SPARKS |
|---|---|
| Readability & contrast | Settings → Appearance: font size, density, light/dark theme (including “System”) |
| Keyboard & shortcuts | Settings → Keyboard Shortcuts; global search/command palette with Ctrl+K / Cmd+K; Skip link “Skip to main content” (keyboard focus) |
| Accessibility tab | Settings → Accessibility: identify in live captions, always show subtitles; link to statement at /accessibility and feedback form |
| Focus & interruptions | Settings → Notifications and Privacy (Do Not Disturb); meetings: push-to-talk / unmute shortcut (see Privacy) |
| Meetings | Live captions (moderator starts transcription; the current line may still change while someone is speaking), transcripts in call history (finalized lines only)—see Calls, Meeting roles, and event meeting options. Starter/Free: transcription demo only (typically first 10 minutes after connecting) |
| Mobile | VoiceOver / TalkBack—see Mobile App (iOS/Android) under Platform-Specific Features |
Full help page: Accessibility
Limits: In embedded tabs, custom tabs, and Microsoft Teams apps (web content inside an iframe), accessibility is governed by the third-party site. Immersive View (Together Mode) remains visual; screen readers hear participant names. Sidebar and Planner order: Alt+arrow keys (see Accessibility).
If you hit a barrier, use feedback at /accessibility, or contact your support or IT team—concrete reports help prioritize improvements.
Main Features
Navigation
The sidebar provides access to all main features:
- Chat - Matrix chat rooms and conversations
- Teams - Matrix teams and channels
- Calendar - Calendar (Microsoft, Sparks Scheduler, Google, Nextcloud, Open-Xchange)
- Planner - Task management (Microsoft Planner, Nextcloud, Open-Xchange, Google when enabled)
- Calls - Voice and video calls, contacts/phone book, speed dial
- Contacts - People from Microsoft, Nextcloud, Open-Xchange, Google when enabled
- Activity - Notifications and activity feed
- AI Assistant - AI chat for calendar, tasks, and meeting preparation
- Microsoft Teams Chat - Direct Teams chat messages
- Microsoft Teams Channels - Teams channel conversations
📸 Excerpt – sidebar:

Sidebar Apps
The sidebar shows these apps (order may vary):
| App | Path | Description |
|---|---|---|
| Chat | / | Matrix chat rooms |
| Teams | /teams | Matrix teams and channels |
| Calendar | /calendar | Calendar (Microsoft, Sparks Scheduler, Google, Nextcloud, OX) |
| Planner | /planner | Tasks (Microsoft Planner, Nextcloud, OX, Google when enabled) |
| Calls | /calls | Voice/video calls, phone book, speed dial |
| People | /contacts | Contacts from connected providers |
| Activity | /activity | Notifications and activity feed |
| AI Assistant | /assistant | AI chat for calendar, contacts, tasks, chats |
| Microsoft Teams Chat | /ms-chat | Direct Teams messages |
| Microsoft Teams Channels | /ms-channels | Teams channel conversations |
Customizing Sidebar
-
Reorder Apps: Drag and drop apps in the sidebar to reorder them
-
Show/Hide Apps: Right-click on an app to hide or show it
-
Add Apps: Click the "+" button to add apps from the catalog (Microsoft Teams apps or custom URLs)
-
Settings → Appearance: Option "Separate Matrix and Microsoft" groups Matrix and Microsoft apps separately
📸 Screenshot: Sidebar customization dialog
Chat & Messaging
Matrix Chat
Viewing Rooms
-
All your Matrix rooms appear in the chat list
-
Click on a room to open it
-
Unread messages are indicated with a badge
📸 Overview:
📸 Excerpt – chat list: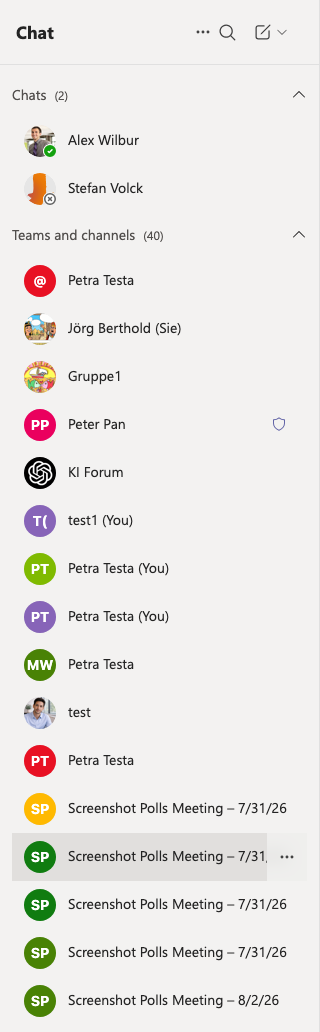
Sending Messages
-
Select a room from the chat list
-
Type your message in the message input at the bottom
-
Press Enter to send
-
Use Shift+Enter for a new line
📸 Excerpt – message input:

Message Features
-
Emoji Reactions: Click the emoji button or hover over a message to add reactions
-
Reply: Context menu → Reply, or hover a message and press R. A preview appears above the composer; sent replies show a quote chip (click to jump to the original). Works for text and attachments. Details: Area: Chat
-
Edit: Right-click your own message and select "Edit"
-
Delete: Right-click your own message and select "Delete"
-
Forward: Right-click a message and select "Forward"
-
Pin Messages: Click the pin icon to pin important messages
📸 Screenshot: Message context menu
Voice messages & transcription
- Record: Microphone icon in the message input → record, preview, send or discard
- Send with transcript: Optional checkbox sends recognized text together with the audio
- Outgoing voice messages use Matrix Voice Messages (MSC3245) for Element interop
- Transcribe received messages: Transcribe under the audio player; results are cached locally
- See Chat area – Voice messages for privacy and organization policy notes
Stickers & room list tags
- Stickers are sent as Matrix
m.sticker - Pin to top / low priority write Matrix tags
m.favourite/m.lowpriority(visible in Element)
Video messages (clips)
- Record: + → Record video clip → record, preview, send or discard
- Attach: Video files via + / drag & drop; local preview often plays immediately after send
- See Chat area – Video messages
Hide chat
- Chat list menu → Hide chat (history kept; restore under Hidden chats). This is not the same as leaving the room.
Meeting system lines
- After meetings, the linked chat may show transcript available / recording available (call log link or download)
Creating Rooms
-
Click the "+" button in the chat list
-
Enter a room name
-
Choose room settings (public/private, encryption)
-
Click "Create"
📸 Screenshot: Create room dialog
Room Settings
-
Click the room name or settings icon to access room settings
-
Configure room name, topic, avatar
-
Manage members and permissions
-
View room encryption status
📸 Screenshot: Room settings drawer
Chat and Channel Tabs
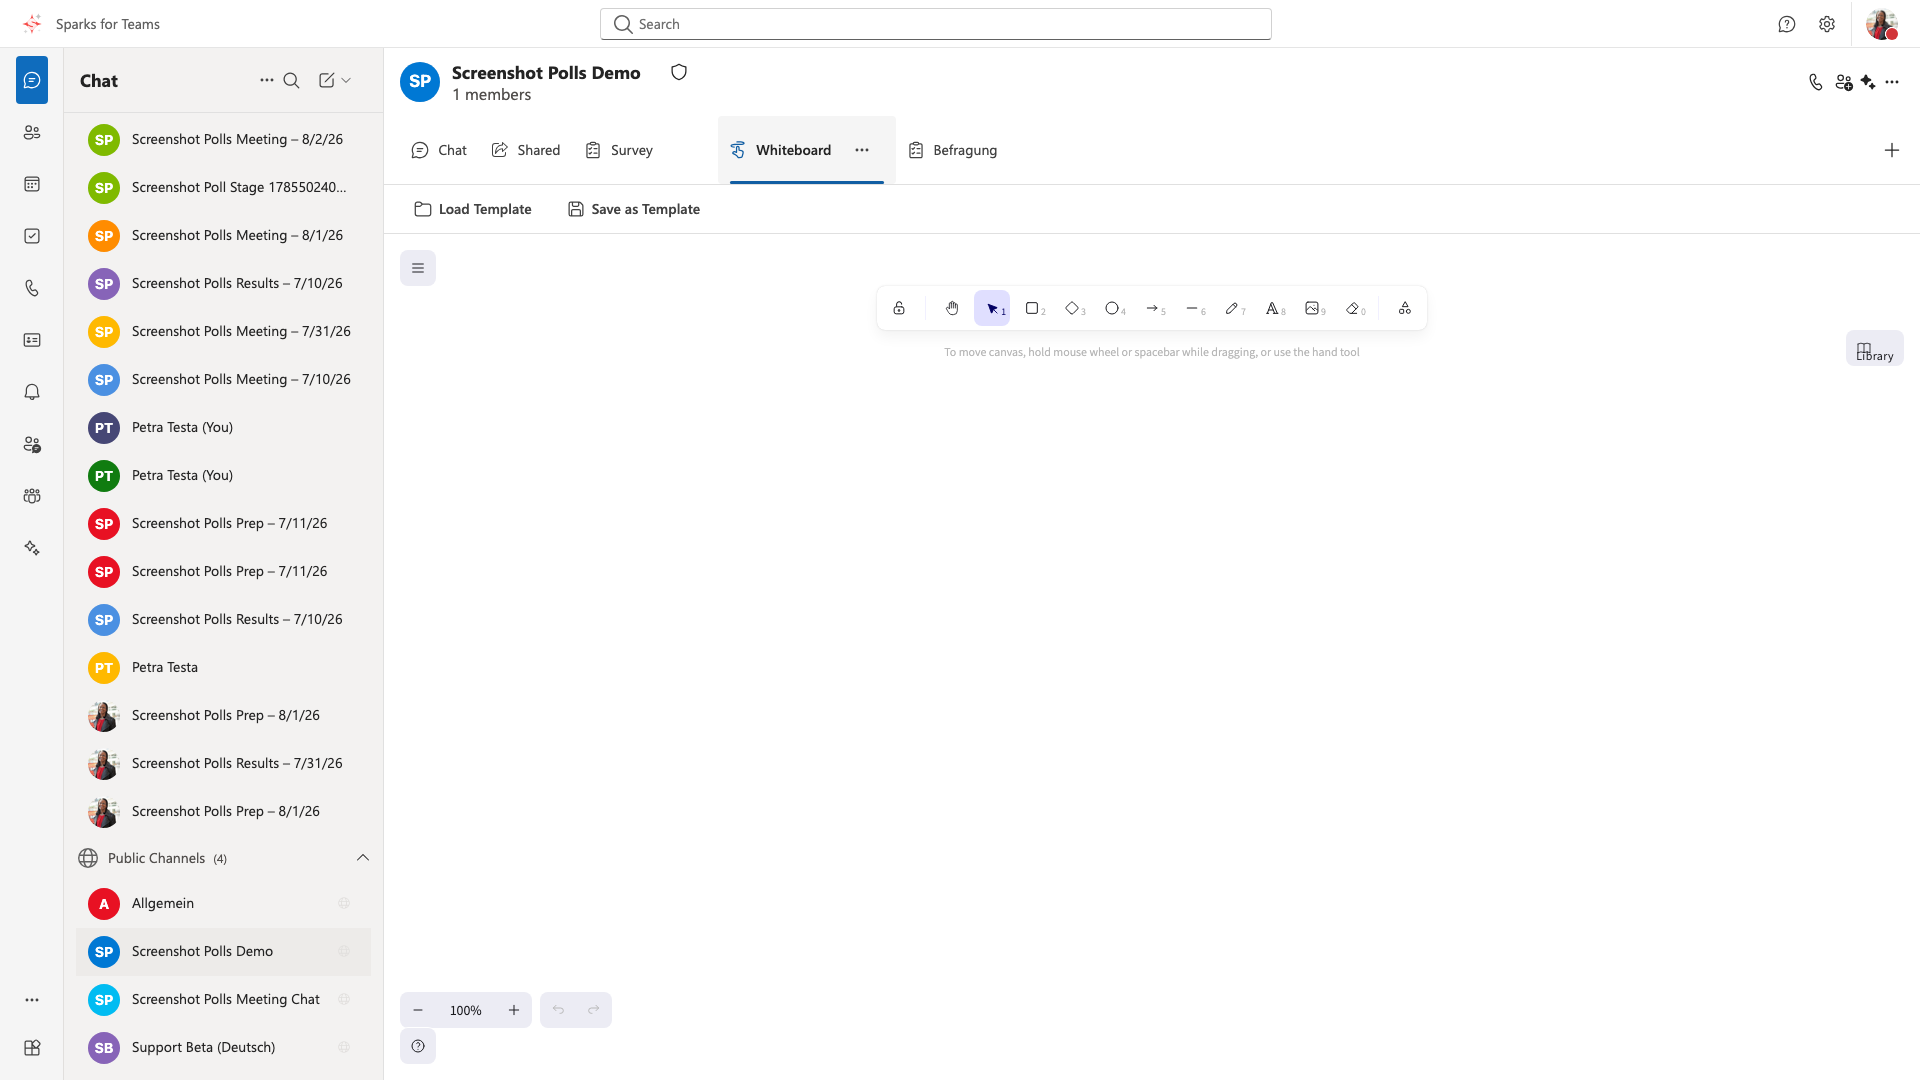
Chat rooms and channels can have tabs – additional panels alongside the conversation.
Adding a tab:
- Open a chat room or channel
- Click the "+" button in the tab bar (or "Add Tab" / "Apps")
- Pick an app (search or categories), configure a Website URL, or import a Teams manifest
Integrated tabs:
- Polls (Survey): Create and participate in polls within the chat or channel
- Whiteboard: Collaborative drawing with Excalidraw. Sketch, draw shapes, add text, and collaborate in real time. All participants see the same canvas. For Excalidraw features and usage, see the official Excalidraw documentation.
Website / custom tabs:
- Add external web apps by URL (e.g. shared documents, dashboards)
- Enter a valid HTTP/HTTPS URL
- The tab loads in an iframe; some sites may block embedding
- Developers can also import a Teams
manifest.json(see developer documentation)
Managing tabs: Right-click a tab to remove it or open in a new window.
Session memory: Which tab was last active (conversation, shared view, polls, files, widget tabs, …) is remembered per room or channel for the current browser session. When you open the same room or channel again, that tab is selected; the default is the main conversation or posts view. A new browser tab or another browser does not share this memory.
📸 Screenshot:
📸 Screenshot:
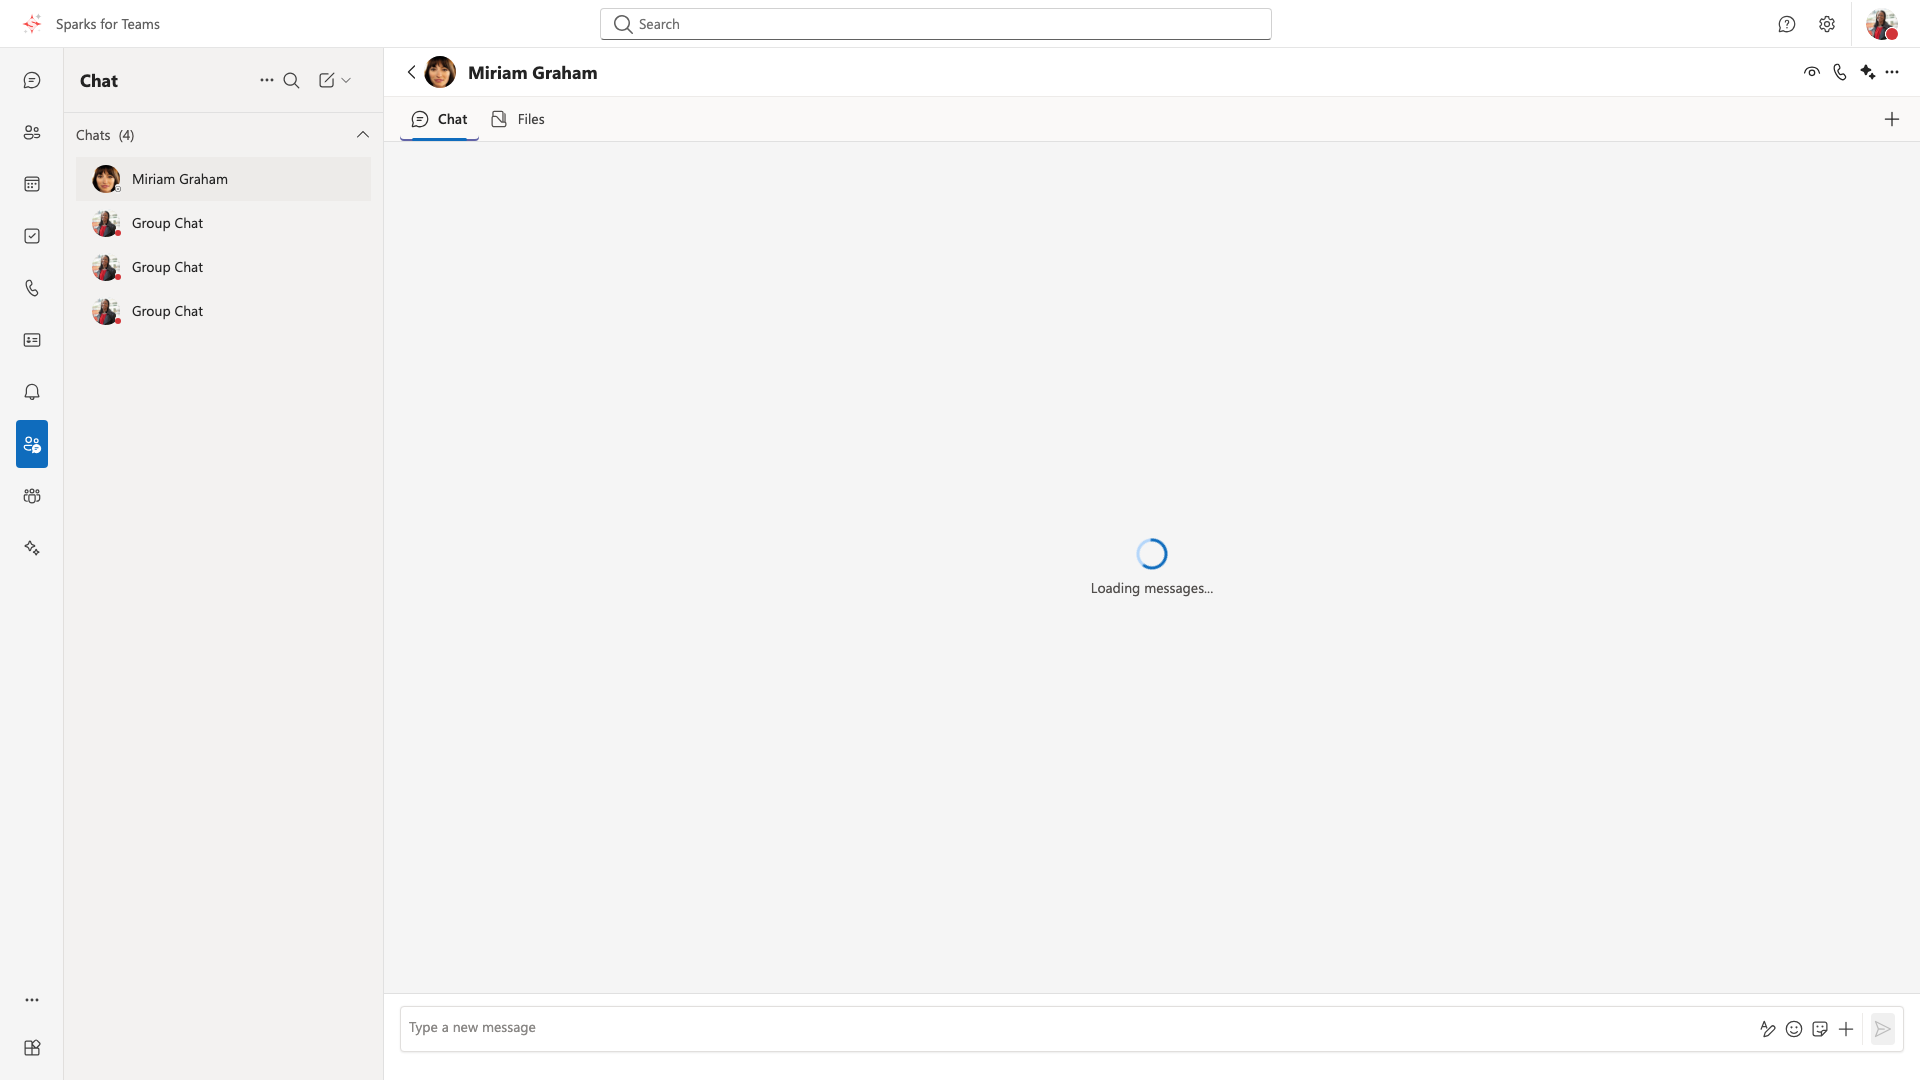
Microsoft Teams Chat
Access Microsoft Teams direct messages (1:1 chats) via Microsoft Graph:
- Navigate to "Microsoft Teams Chat" in the sidebar
- View your Teams conversations in the chat list (left)
- Select a chat to view and send messages
- Search for chats using the search field
Features:
- Send messages: Rich text, emojis, mentions (@)
- Files & images: Attachments in messages; download via context menu or download action (including encrypted media where supported)
- Edit/Delete: Edit or delete your own messages
- Reactions: Add emoji reactions to messages
- Read receipts: See when messages have been read
- Forward: Forward messages to other chats
- Pin/Mute: Pin important chats, mute notifications
- Chat settings: Configure notification behavior per chat
Requirements: Microsoft/Office 365 account must be connected.
📸 Screenshot:
Microsoft Teams Channels
Access Microsoft Teams channels (team conversations) via Microsoft Graph:
- Navigate to "Microsoft Teams Channels" in the sidebar
- Select a team from the list (left)
- Select a channel within that team
- View and participate in channel conversations
Features:
- Posts: Create new posts, reply to existing ones
- Threads: Reply in threads to keep conversations organized
- Reactions: Add emoji reactions to messages
- Edit/Delete: Edit or delete your own messages
- Pin messages: Pin important messages in the channel
- @Mentions: Mention team members with @
- Files: View and upload files in the channel
- Create team/channel: Create new teams and channels (if you have permissions)
- Manage: Edit team/channel settings, manage members
Requirements: Microsoft/Office 365 account must be connected.
📸 Screenshot:
SPARKS includes powerful search capabilities with advanced filtering options.
Opening Advanced Search
-
Click the search icon in the top toolbar (or press Ctrl+K / Cmd+K)
-
Select "Advanced Search" from the search menu
-
The advanced search dialog will open
📸 Screenshot: Advanced Search dialog
Search Filters
You can filter your search results using:
- Date Range: Search for messages within a specific time period
- Select "From Date" to set the start date
- Select "To Date" to set the end date
- Sender: Filter messages by a specific user
- Select a user from the sender dropdown
- Room: Search within a specific room
- Select a room from the room dropdown
- File Type: Filter by file type
- Images: Photos and graphics
- Documents: PDFs, Word docs, etc.
- Videos: Video files
- Audio: Audio files
Performing a Search
- Enter your search query in the search box
- (Optional) Apply filters to narrow down results
- Click "Search" or press Enter
- Results will appear below with message previews
- Click on a result to navigate to that message in the room
Search Tips
-
Use multiple filters together for precise searches
-
Click "Reset Filters" to clear all filters
-
Search results show message context and metadata
-
Matrix search API provides full-text search within rooms
📸 Screenshot: Search results with filters applied
Spaces
Spaces help you organize your Matrix rooms into hierarchical groups, making it easier to manage large numbers of rooms and conversations.
What are Spaces?
Spaces are containers that can hold:
- Rooms: Chat rooms and conversations
- Other Spaces: Nested spaces for complex organization
- Both: Mix of rooms and sub-spaces
Viewing Spaces
-
Navigate to the Spaces view (may be integrated into sidebar or Chat section)
-
You'll see a tree view of all your spaces
-
Click on a space to expand it and see its contents
-
Click on a room within a space to open it
📸 Screenshot: Space hierarchy tree view
Space Hierarchy
Spaces can be nested to create organizational hierarchies:
- Parent Spaces: Top-level spaces
- Child Spaces: Spaces within other spaces
- Rooms: Individual chat rooms within spaces
The space tree shows:
- Space names and descriptions
- Member counts
- Unread message indicators
- Expandable/collapsible nodes
Creating Spaces
-
Click the "+" button in the Spaces view
-
Enter a space name
-
(Optional) Add a description
-
Click "Create"
-
The new space will appear in your space tree
📸 Screenshot: Create space dialog
Adding Rooms to Spaces
- Right-click on a room in your chat list
- Select "Add to Space"
- Choose the space where you want to add the room
- The room will now appear under that space in the hierarchy
Space Settings
To manage a space:
-
Right-click on a space in the tree view
-
Select "Space Settings"
-
Configure:
- Name: Change the space name
- Description: Add or edit the description
- Members: View space members
-
Click "Save" to apply changes
📸 Screenshot: Space settings dialog
Organizing with Spaces
Use spaces to organize:
- Projects: Group rooms by project
- Teams: Organize by team or department
- Topics: Group related conversations
- Clients: Separate client communications
Space Features
-
Pinning: Pin important spaces for quick access
-
Unread Counts: See unread messages at a glance
-
Member Counts: View how many people are in each space
-
Nested Organization: Create complex hierarchies for large organizations
📸 Screenshot: Space with nested rooms and sub-spaces
User Profiles
SPARKS allows you to view and manage user profiles, including your own profile and profiles of other users.
Viewing Your Profile
-
Click on your avatar in the top toolbar
-
Select "Profile" from the menu
-
Your profile dialog will open showing:
- Display name
- Avatar
- Status message
- Devices
- Security settings link
📸 Screenshot: Your profile view
Viewing Other Users' Profiles
-
Click on a user's avatar in a chat room
-
Or click on a user's name in the member list
-
The user's profile will open showing:
- Display name
- Avatar
- Status message
- Presence status (online, away, busy, offline)
- Last seen time
📸 Screenshot: Other user's profile view
Editing Your Profile
-
Open your profile (see "Viewing Your Profile" above)
-
Click "Edit" or "Edit Profile"
-
Update:
- Display Name: Your name as others see it
- Avatar URL: MXC URL (mxc://...) or HTTP URL for your avatar
- Status Message: A short message about your current status
-
Click "Save" to apply changes
📸 Screenshot: Profile editor dialog
Status Messages
Status messages let you share what you're currently doing:
- Examples: "Working from home", "In a meeting", "Available"
- Status messages are visible to other users
- You can update your status message anytime
- Status messages are stored in your account data
Device Management
View and manage your devices:
-
Open your profile
-
Click on "Devices" or "Device Management"
-
You'll see a list of all devices where you're logged in:
- Device ID
- Device name (if set)
- Last seen time
-
You can delete devices you no longer use:
- Click "Delete" next to a device
- Confirm the deletion
📸 Screenshot: Device list dialog
Note: Deleting a device will log you out from that device. Make sure you have access to your encryption keys before deleting devices.
Profile Features
- Presence Indicators: See when users are online, away, busy, or offline
- Last Seen: View when a user was last active
- Security Settings: Quick link to security and encryption settings
- Device List: Manage all your logged-in devices
Calendar
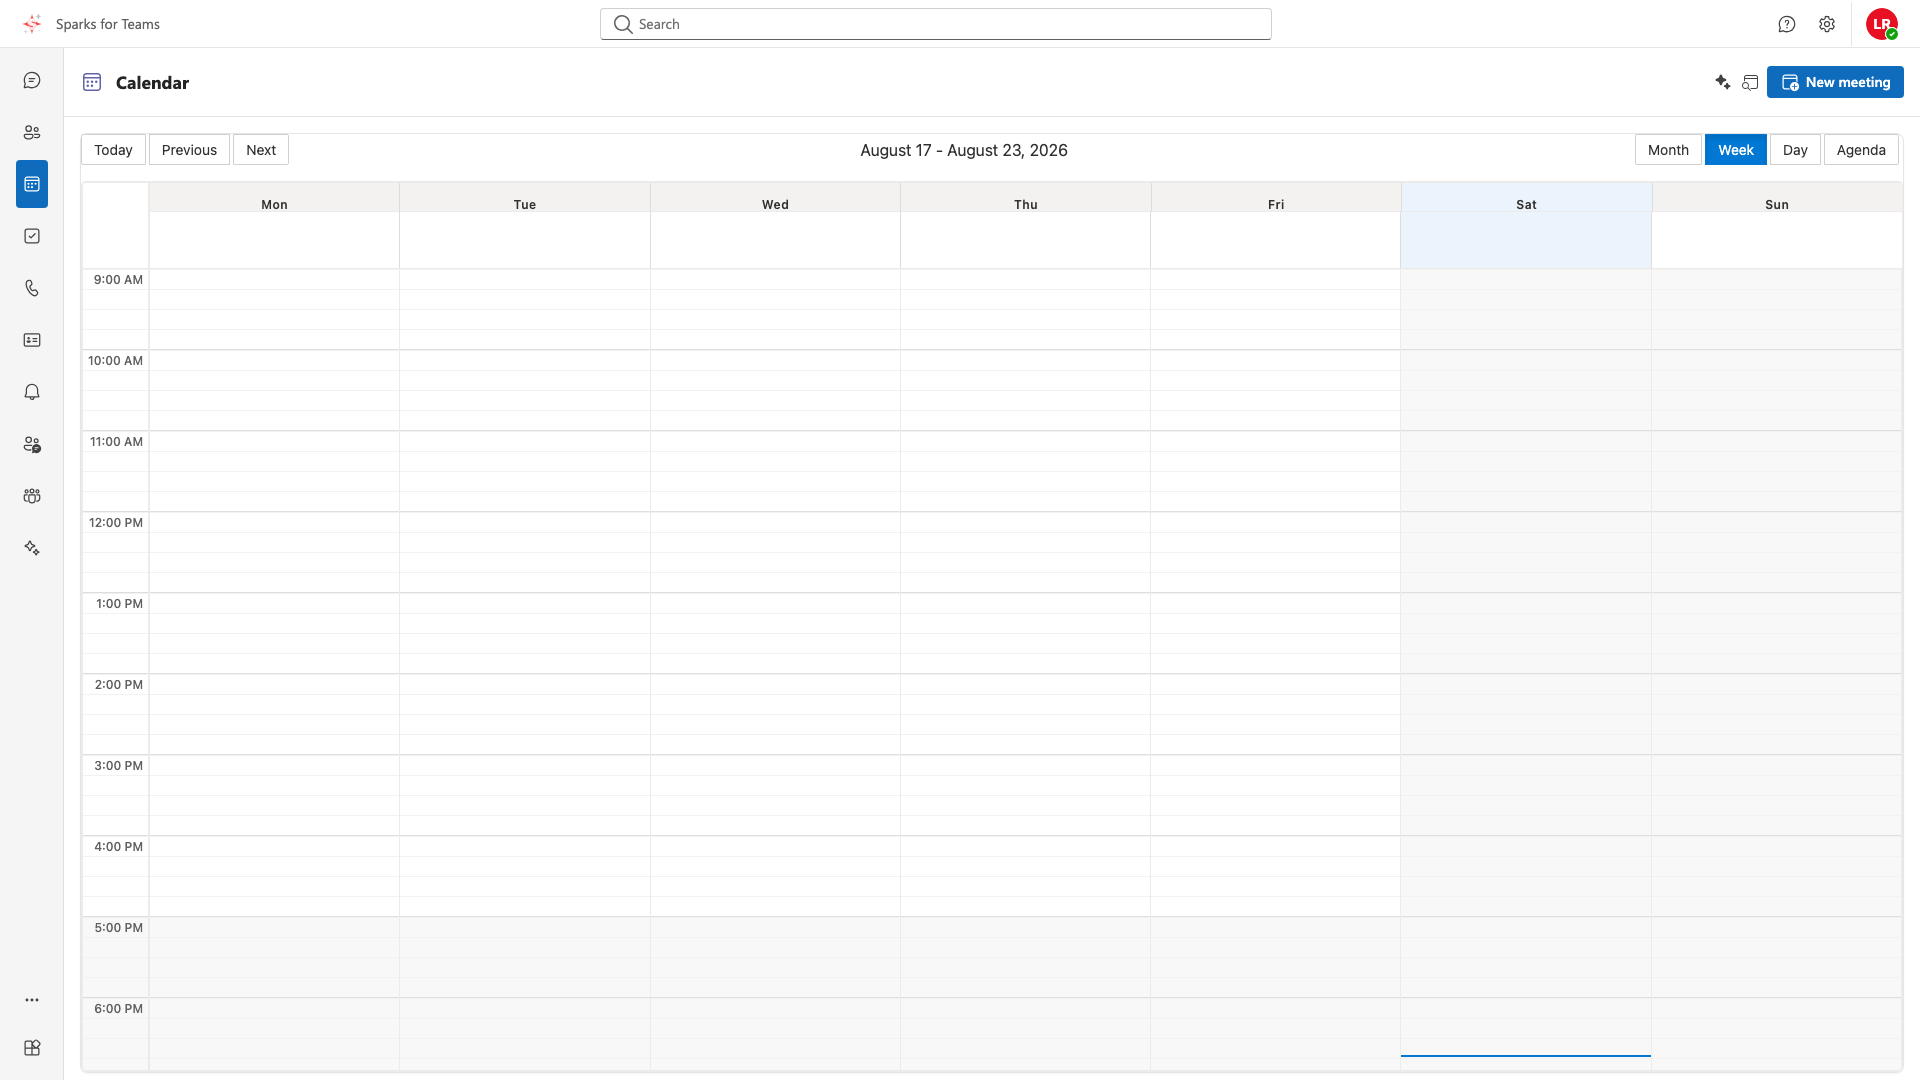
The Calendar displays events from your connected providers (Microsoft Outlook, Nextcloud CalDAV, Open-Xchange). Events from different providers may show provider badges to identify their source. Invites and event changes refresh live while the calendar is open.
Viewing Calendar
-
Click "Calendar" in the sidebar
-
Choose your view:
- Day View: See events for a specific day
- Week View: See events for the week
- Month View: See events for the month
- Agenda View: List view of upcoming events
-
Use the date navigator to move between days/weeks/months
-
Events from multiple providers are shown together; provider badges indicate the source
📸 Screenshot:
Creating Events
-
Click the "+" button or double-click on a time slot
-
Fill in event details:
- Title: Event name
- Date and time: Start and end
- Location: Physical or virtual location
- Attendees: Add participants (email addresses)
- Description: Optional notes
-
Choose if it's an online meeting (creates a meeting link)
-
Sparks meeting options (when Sparks online meeting is on): access, lobby, chat/polls/Q&A, recording, captions, meeting language, transcript, and post-meeting sharing (participant protocol and/or stored transcript to selected attendees). When editing an appointment, More options includes poll drafts before the meeting. Some options depend on your organization’s plan—the Basic (free) tier disables recording, transcripts, and meeting E2EE in the dialog; you can still schedule a longer calendar block, but the active meeting session is capped at 60 minutes (a notice may appear in the invitation). Access rules are also enforced on the server when issuing the join token, if the appointment is stored on the same Vista node. See Event and meeting options.
-
Recurring events: Set recurrence (daily, weekly, monthly, etc.)
-
Select the provider/calendar where the event should be saved (if multiple are connected)
-
Click "Save"
📸 Screenshot: New event dialog
Editing Events
-
Click on an event to view details
-
Click "Edit" to modify the event
-
Make changes and click "Save"
-
Delete: Remove the event from your calendar
📸 Screenshot: Event details view
Meeting Chat (Sparks / Scheduler meetings)
For events that have a Sparks meeting (Scheduler appointment), you can open the meeting chat – a Matrix room used for chat, Q&A, and polls before, during, and after the meeting.
From the calendar:
- Right-click an event that has a Sparks meeting (e.g. "Join Sparks Meeting" is shown in the context menu)
- Click "Open meeting chat" (or "Meeting-Chat öffnen" in German)
- If the meeting does not yet have a chat room, one is created automatically and you are taken to the chat view
- If the meeting already has a chat room, that room opens in the chat list
- Poll results (organizer): from the same context menu after the meeting – overview and CSV export
In the meeting: If you open the Chat tab in the meeting toolbar and the meeting has no chat room yet, a Matrix room is created on first use and the chat opens. You can then use Chat, Q&A, and Polls in that room.
This "create on first access" behaviour means a chat room is only created when someone actually uses it (from the calendar or in the meeting).
📸 Screenshot: Calendar context menu with "Open meeting chat" 📸 Screenshot: Meeting toolbar with Chat tab (optional: first-time open)
Outlook add-in (Sparks Meeting & Calendar)
If your organization has deployed the Sparks Outlook add-in, you can manage Sparks online meetings and Sparks appointments directly in Microsoft Outlook (web, New Outlook, Mac):
- Sparks Meeting (ribbon when composing an appointment): task pane with meeting options; join link and meeting ID in the invitation; mirrored to Sparks Appointments
- Sparks Calendar (when reading mail): view Sparks events in the task pane and create new events
- Sparks event (when reading mail): create an appointment from the email with recipients pre-filled
- Sign-in: Sparks organization account (SSO or manual); session persists until sign-out
- Teams replacement: With org-wide deployment, Sparks can replace the Teams meeting toggle; if a Teams link is detected, you can replace it with Sparks
Full guide, client support, and troubleshooting: Outlook add-in. Meeting options match the Sparks app: Event and meeting options.
Calendly integration
Under Settings → Accounts you can connect Calendly. Bookings appear in the Sparks calendar; optionally with a Sparks online meeting and busy sync to Outlook. Guide: Calendly integration.
Sparks booking pages
Under Settings → Accounts → Booking page you can publish your own public page at /book/… (without Calendly). Guests book slots; events land in the Sparks calendar. Guide: Sparks booking pages.
Scheduling Assistant
When creating or editing events with attendees:
-
Click "Scheduling Assistant"
-
View attendee availability (free/busy)
-
Find the best time slot for all attendees
-
Select a time and save
📸 Screenshot: Scheduling assistant view
Multiple Providers
- Connect multiple calendar backends (Microsoft, Nextcloud, OX) in Settings → Provider Accounts
- Events from all connected calendars are displayed in a unified view
- Create events in the calendar of your choice when creating/editing
Planner & Tasks
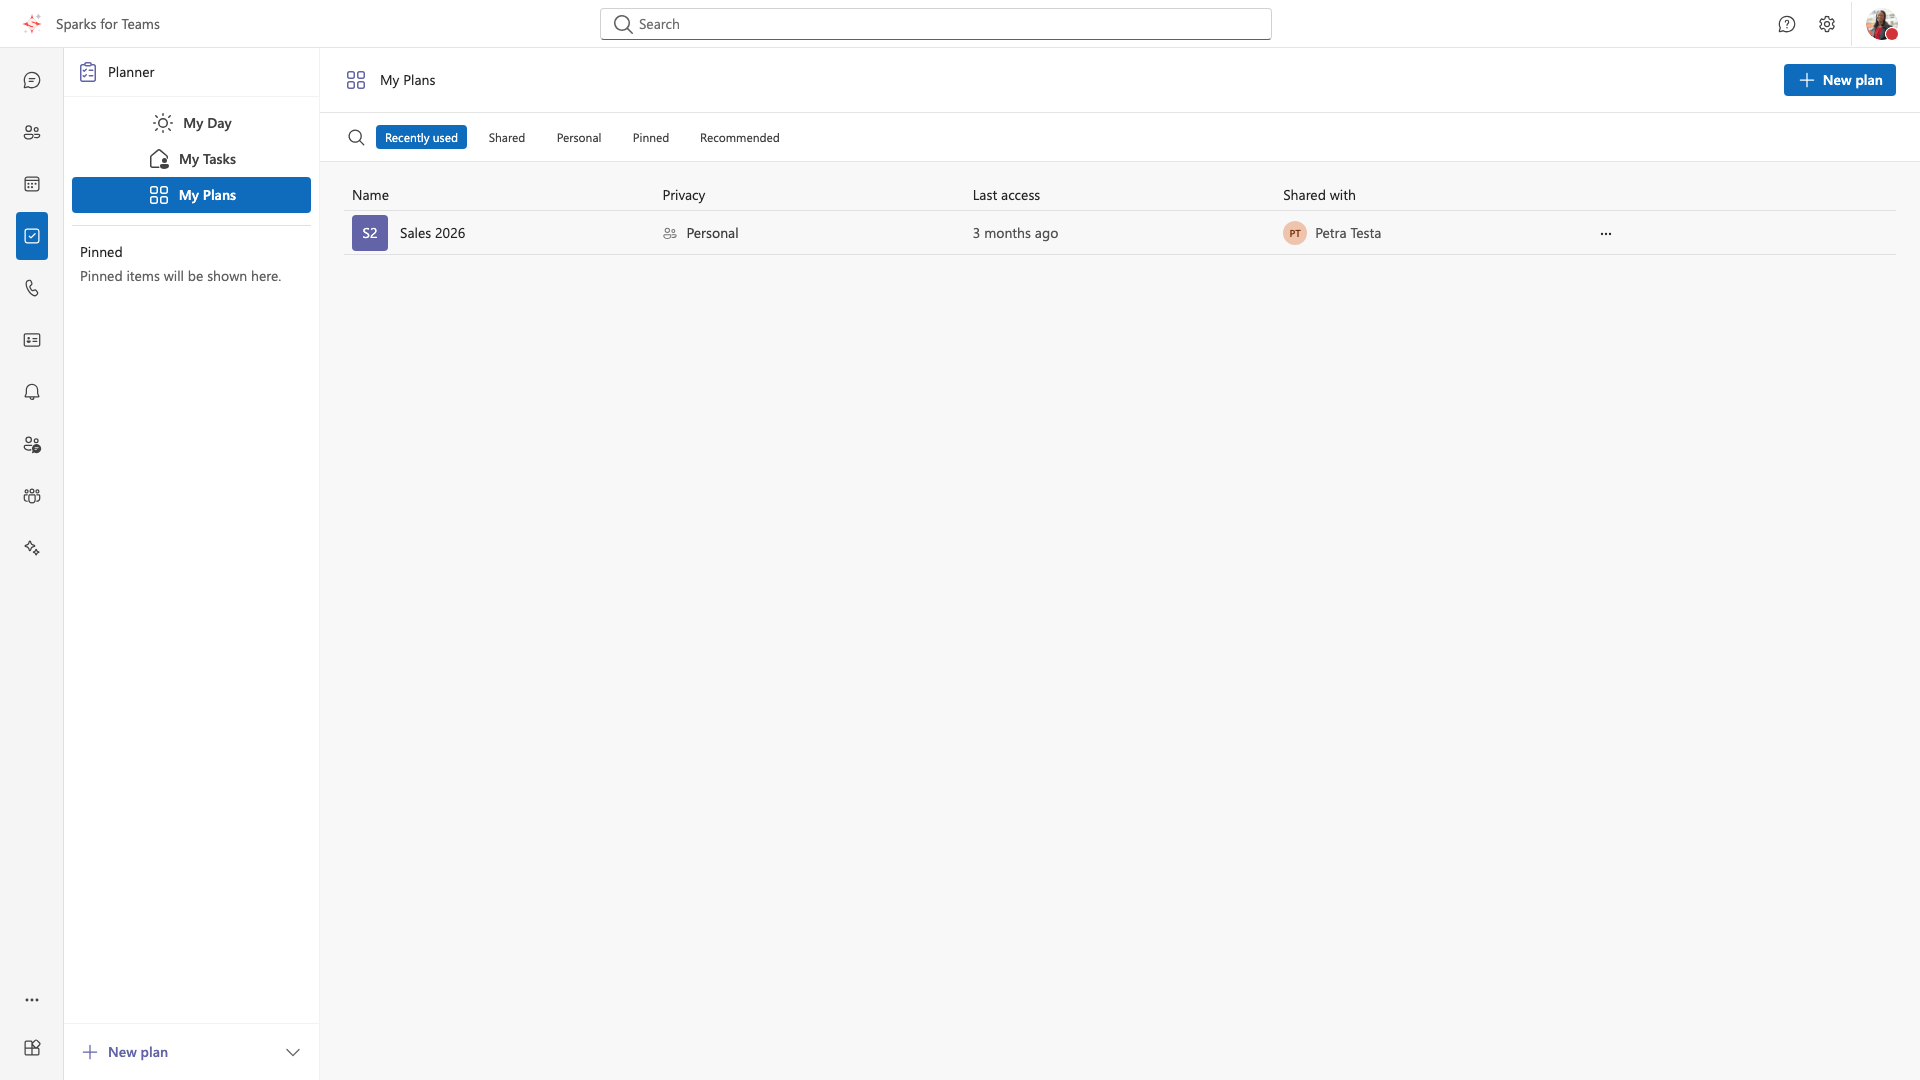
The Planner displays tasks from your connected providers (Microsoft Planner, Nextcloud Tasks, Open-Xchange Tasks). Tasks are organized by plans and buckets; provider badges indicate the source.
For binding a plan to a chat/channel (chat members share a Sparks plan; Microsoft follows the M365 group), saving messages as tasks, and meeting agendas, see Planner in chats & meetings.
Viewing Tasks
-
Click "Planner" in the sidebar
-
Choose your view:
- Board View: Kanban-style board with buckets (columns)
- List View: Simple list of tasks
- Schedule View: Timeline view by due date
- Charts View: Progress charts and statistics
-
Select a plan from the dropdown (if you have multiple plans)
-
Tasks from multiple providers may be shown; provider badges identify the source
📸 Screenshot:
Creating Tasks
-
Click "+ Add task" or the "+" button
-
Enter task details:
- Title: Required
- Due date: Optional
- Assignees: Add team members
- Bucket/Plan: Choose bucket and plan
- Description: Notes and checklist items
- Priority: Low, medium, high
-
Select the provider where the task should be created (if multiple are connected)
-
Click "Create"
📸 Screenshot: Create task dialog
Managing Tasks
-
Move Tasks: Drag and drop tasks between buckets
-
Edit Tasks: Click on a task to edit details
-
Complete Tasks: Check the checkbox or set progress to 100%
-
Assign Tasks: Add team members as assignees
-
Add to My Day: Click the star icon to add to "My Day"
-
Delete: Remove a task (if supported by provider)
📸 Screenshot: Task card with actions
Task Filters
Filter tasks by:
-
All: Show all tasks
-
My Tasks: Show only tasks assigned to you
-
In Progress: Show tasks in progress
-
Completed: Show completed tasks
📸 Screenshot: Filter options
Multiple Providers
- Connect multiple task backends (Microsoft Planner, Nextcloud, OX) in Settings → Provider Accounts
- Tasks from all connected providers are displayed in a unified view
- Create tasks in the provider of your choice when creating
Contacts
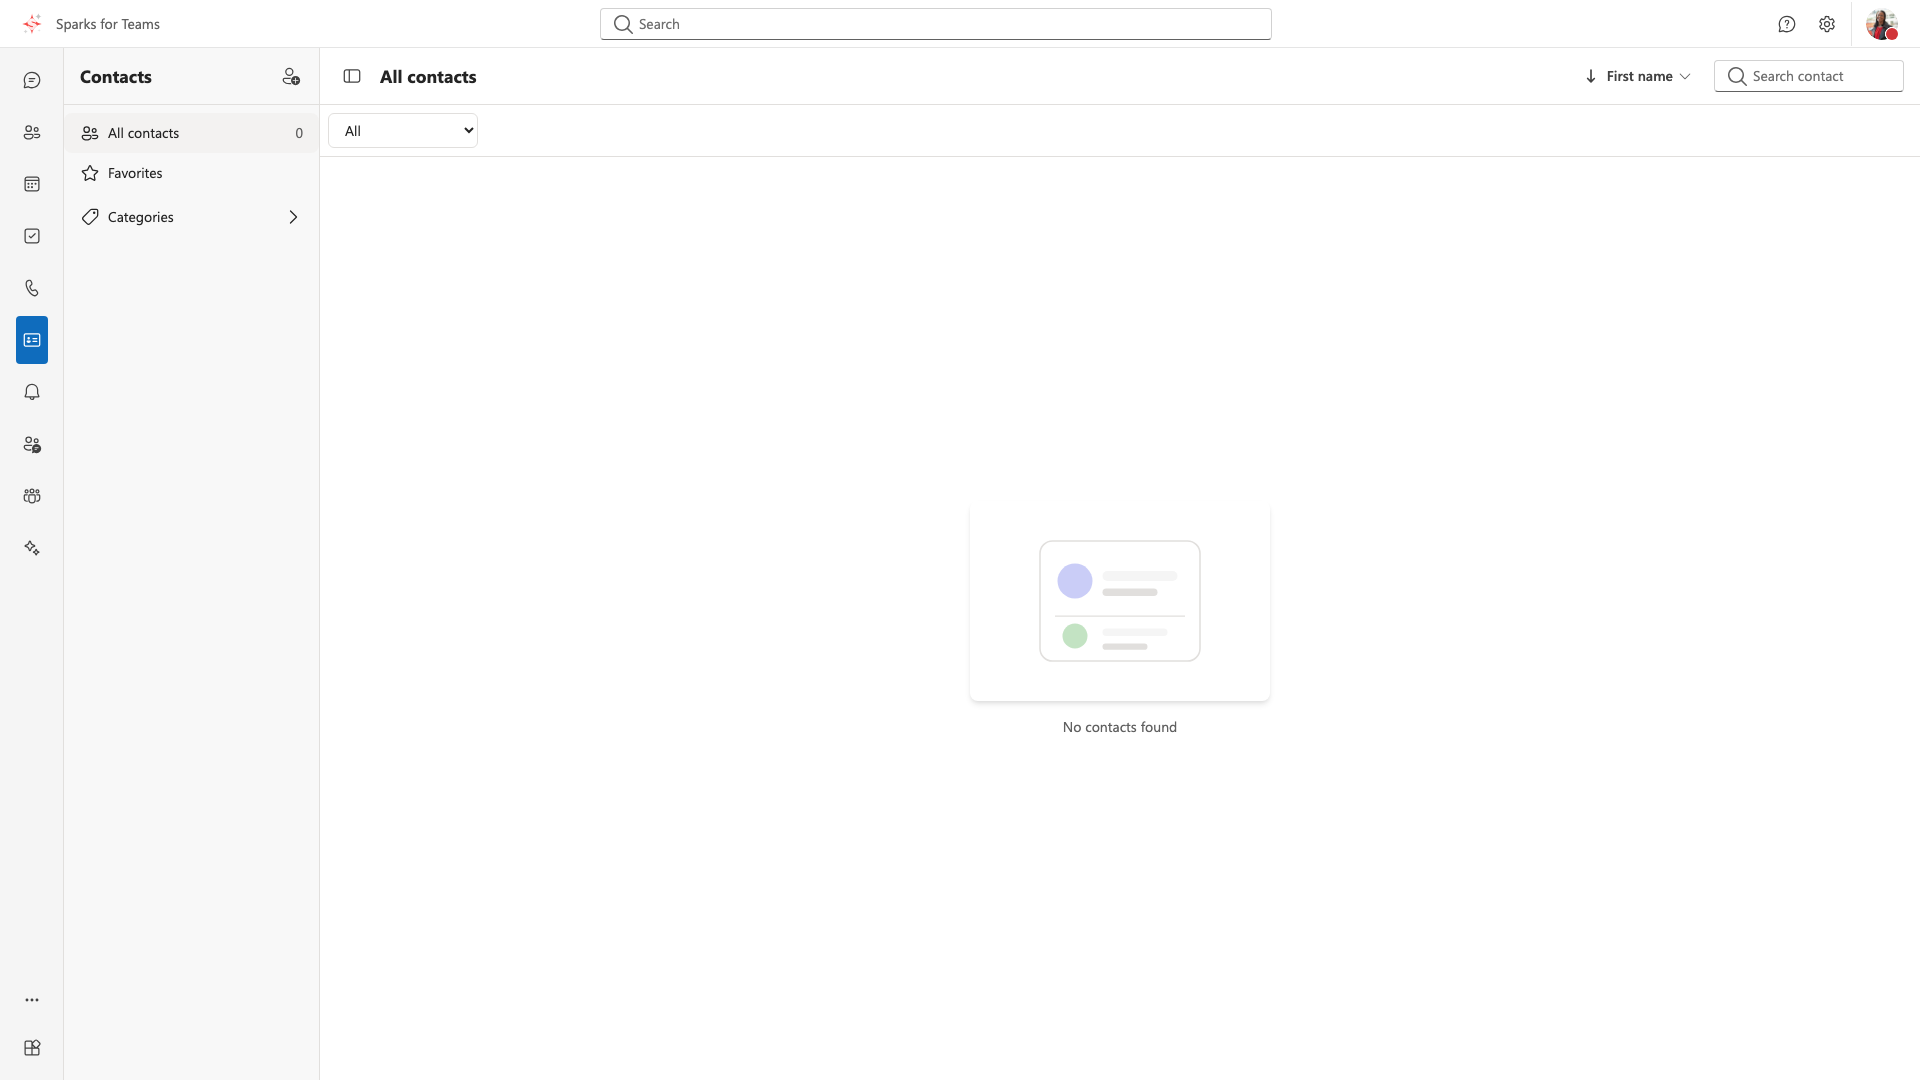
The Contacts (People) page shows contacts from your connected providers (Microsoft Outlook, Nextcloud CardDAV, Open-Xchange). Contacts from all providers are shown in a unified list.
Viewing Contacts
- Click "Contacts" or "People" in the sidebar
- Browse All Contacts, Favorites, or Categories (if your provider supports categories)
- Use the search field to find contacts by name or email
- Click a contact to open the detail view and access actions
Layout:
-
List view: Contact list on the left, details on the right
-
Contact card: Shows name, photo, email, phone, job title, department
📸 Screenshot:
Managing Contacts
- Add contact: Create new contacts in your provider (if supported)
- Edit contact: Update contact details from the provider
- Delete contact: Remove a contact (if supported by provider)
- Add to Speed Dial: From the Calls page or contact context menu
- Remove from Speed Dial: Use the context menu in the speed dial list
- Copy to Microsoft: Save a contact to your Outlook account (requires Contacts.ReadWrite permission)
Contact actions (Chat, Call, Video call) are available from the contact card or context menu.
Multiple Providers
-
Connect multiple address books (Microsoft, Nextcloud, OX) in Settings → Provider Accounts
-
Contacts from all providers are shown in a unified list
-
Provider badges may indicate the source of each contact
📸 Screenshot:
Teams & Channels
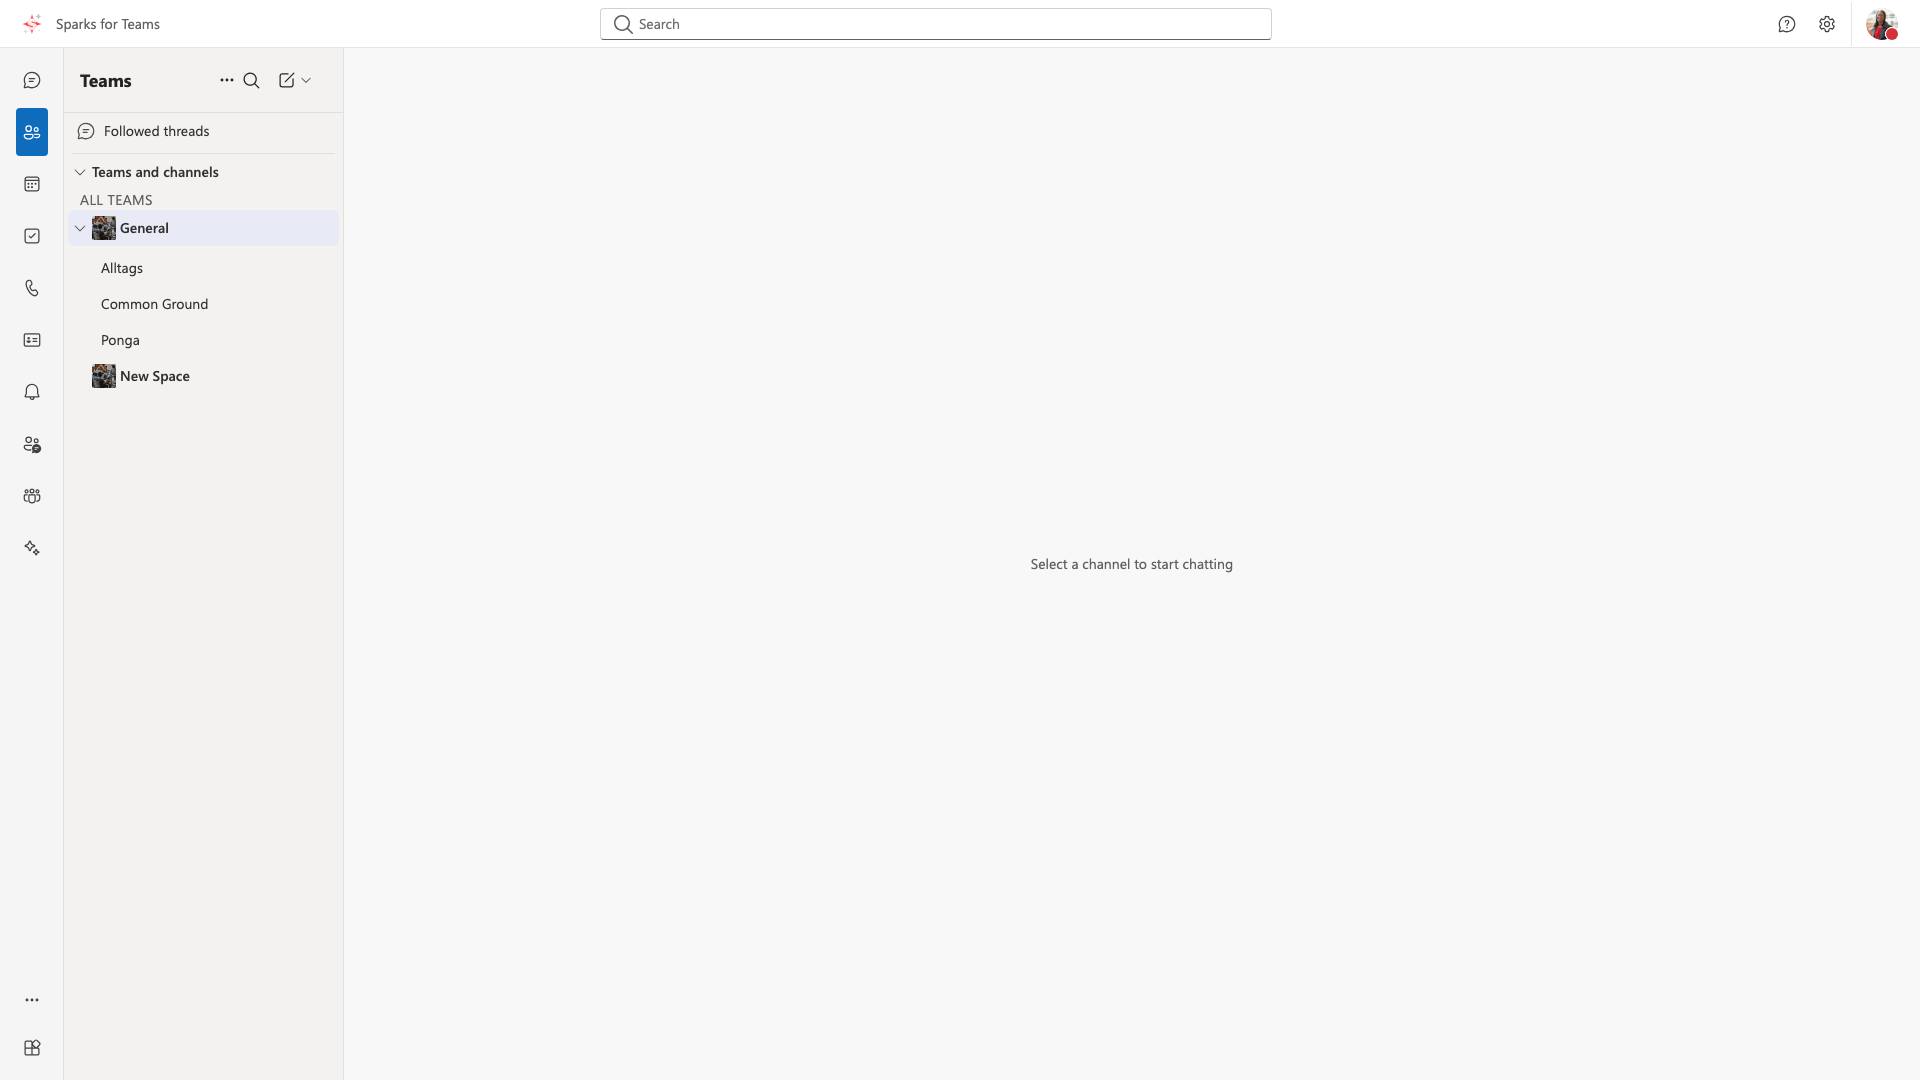
The sidebar Teams item (/teams) shows Matrix teams and channels, not Microsoft Graph. Native Microsoft channels are under Microsoft Teams Channels.
-
Open Teams in the sidebar
-
Select a team, then a channel
-
Read posts, Post in channel, reply in a thread or open the full thread
📸 Screenshot:
Channel features
- Optional subject or announcement on a new post; latest replies and unread highlights in the feed
- Follow threads (list in the sidebar); pin posts (header / ⋯)
- Search in the channel (server for plaintext, loaded posts when encrypted)
- @mentions for people and team tags (team ⋯ → Manage tags)
- Reactions, edit/delete, files, tabs
Details: Area: Teams.
📸 Screenshot: Channel conversation view
Calls
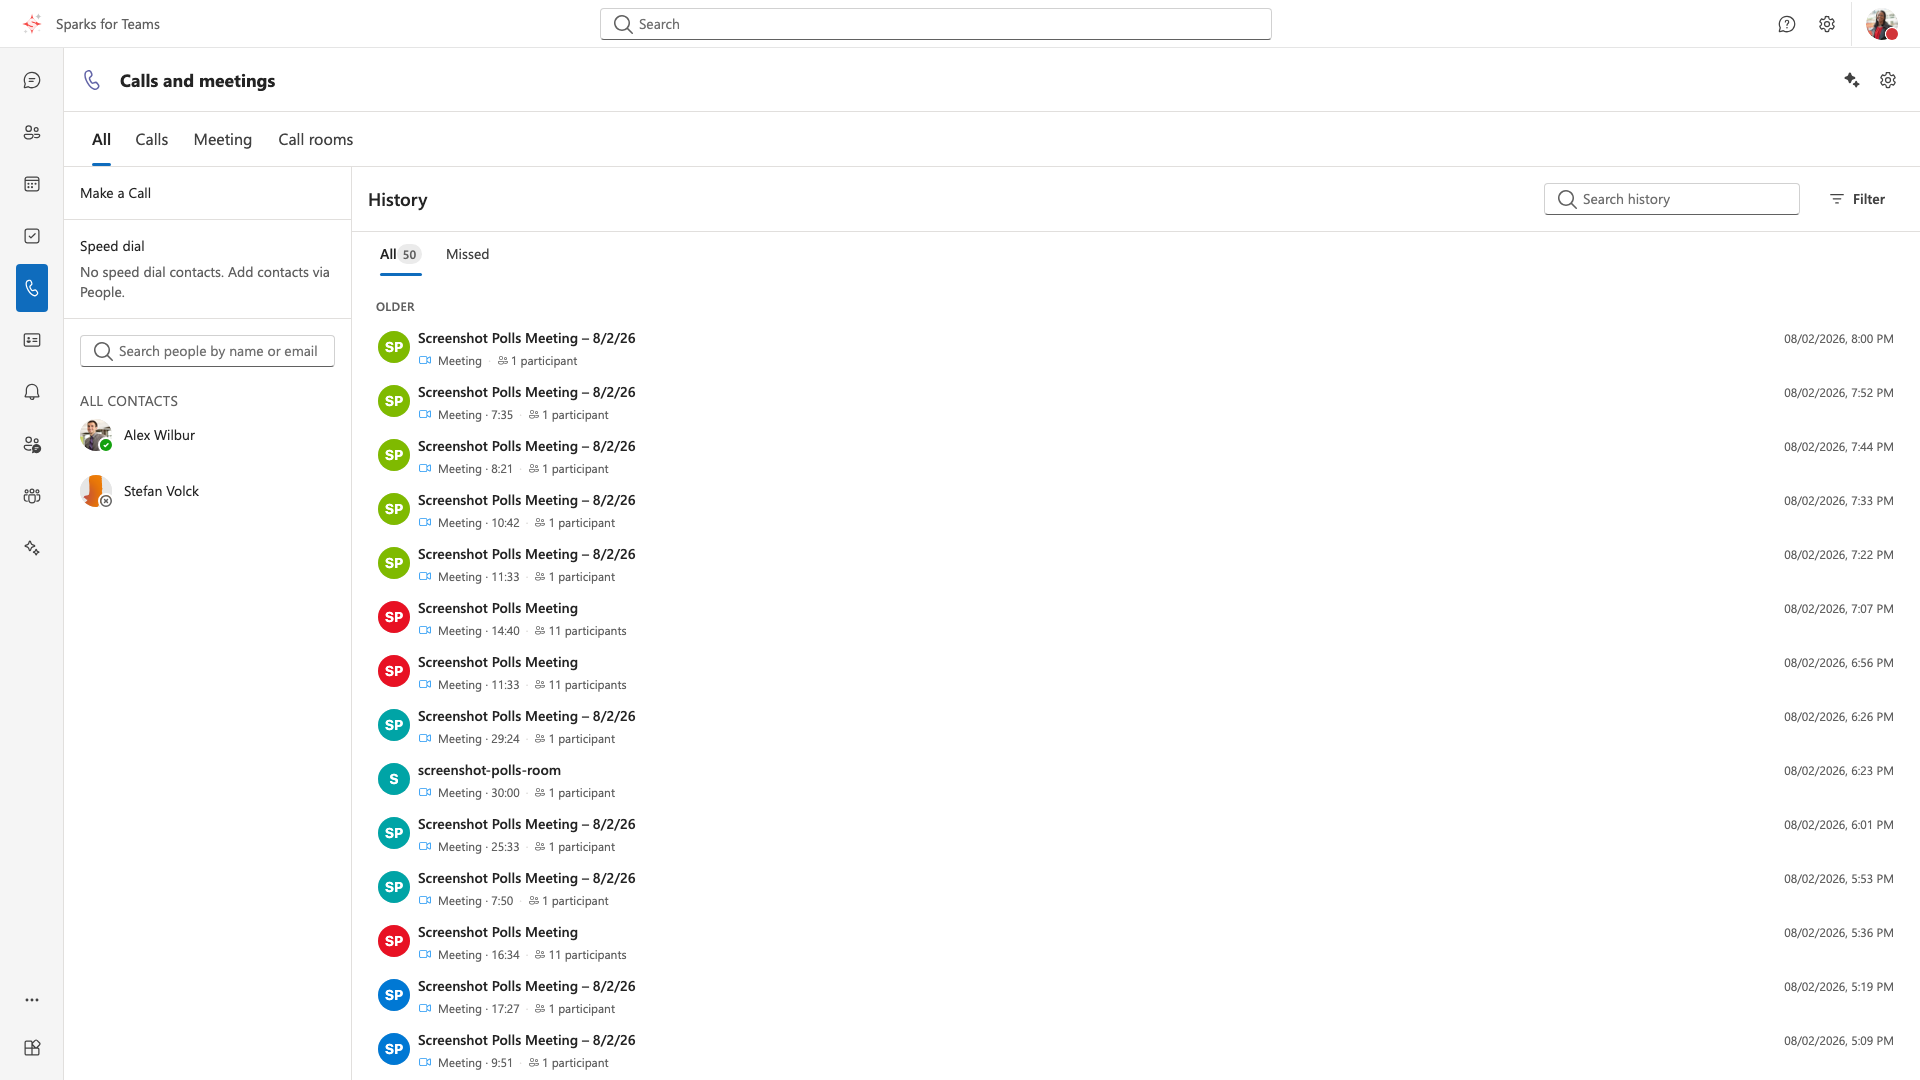
Making Calls
-
Click "Calls" in the sidebar
-
Use the phone book to find contacts
-
Click the call button next to a contact
-
Choose call type:
- Audio Call: Voice only
- Video Call: Video and audio
📸 Screenshot:
Receiving Calls
-
When someone calls you via Sparks (call button in chat), a call dialog appears
-
Use Answer with audio, Answer with video, or Decline
-
For video calls, allow camera and microphone access when prompted
-
Element Call / federation: Federated contacts may call via Element; depending on settings Sparks can decline, notify, or ring and answer in Sparks — see Element Call and federation
📸 Screenshot: Incoming call dialog
During a Call
-
Mute/Unmute: Click the microphone button
-
Video On/Off: Click the camera button
-
Screen Share: Click the screen share button
-
End Call: Click the red end call button
-
Participants: View and manage participants
📸 Screenshot:
Call Log (Call History)
View your past calls (incoming, outgoing, missed, voicemail):
- Click "Calls" in the sidebar
- Switch to the Call Log / History tab
- Browse your call history sorted by date
Features:
- Call types: Incoming, outgoing, missed, voicemail (with different icons)
- Details: Timestamp, duration, participant name
- Search: Search your call history
- Call back: Click a contact to initiate a new call
- Add to Speed Dial: Add frequent contacts to speed dial
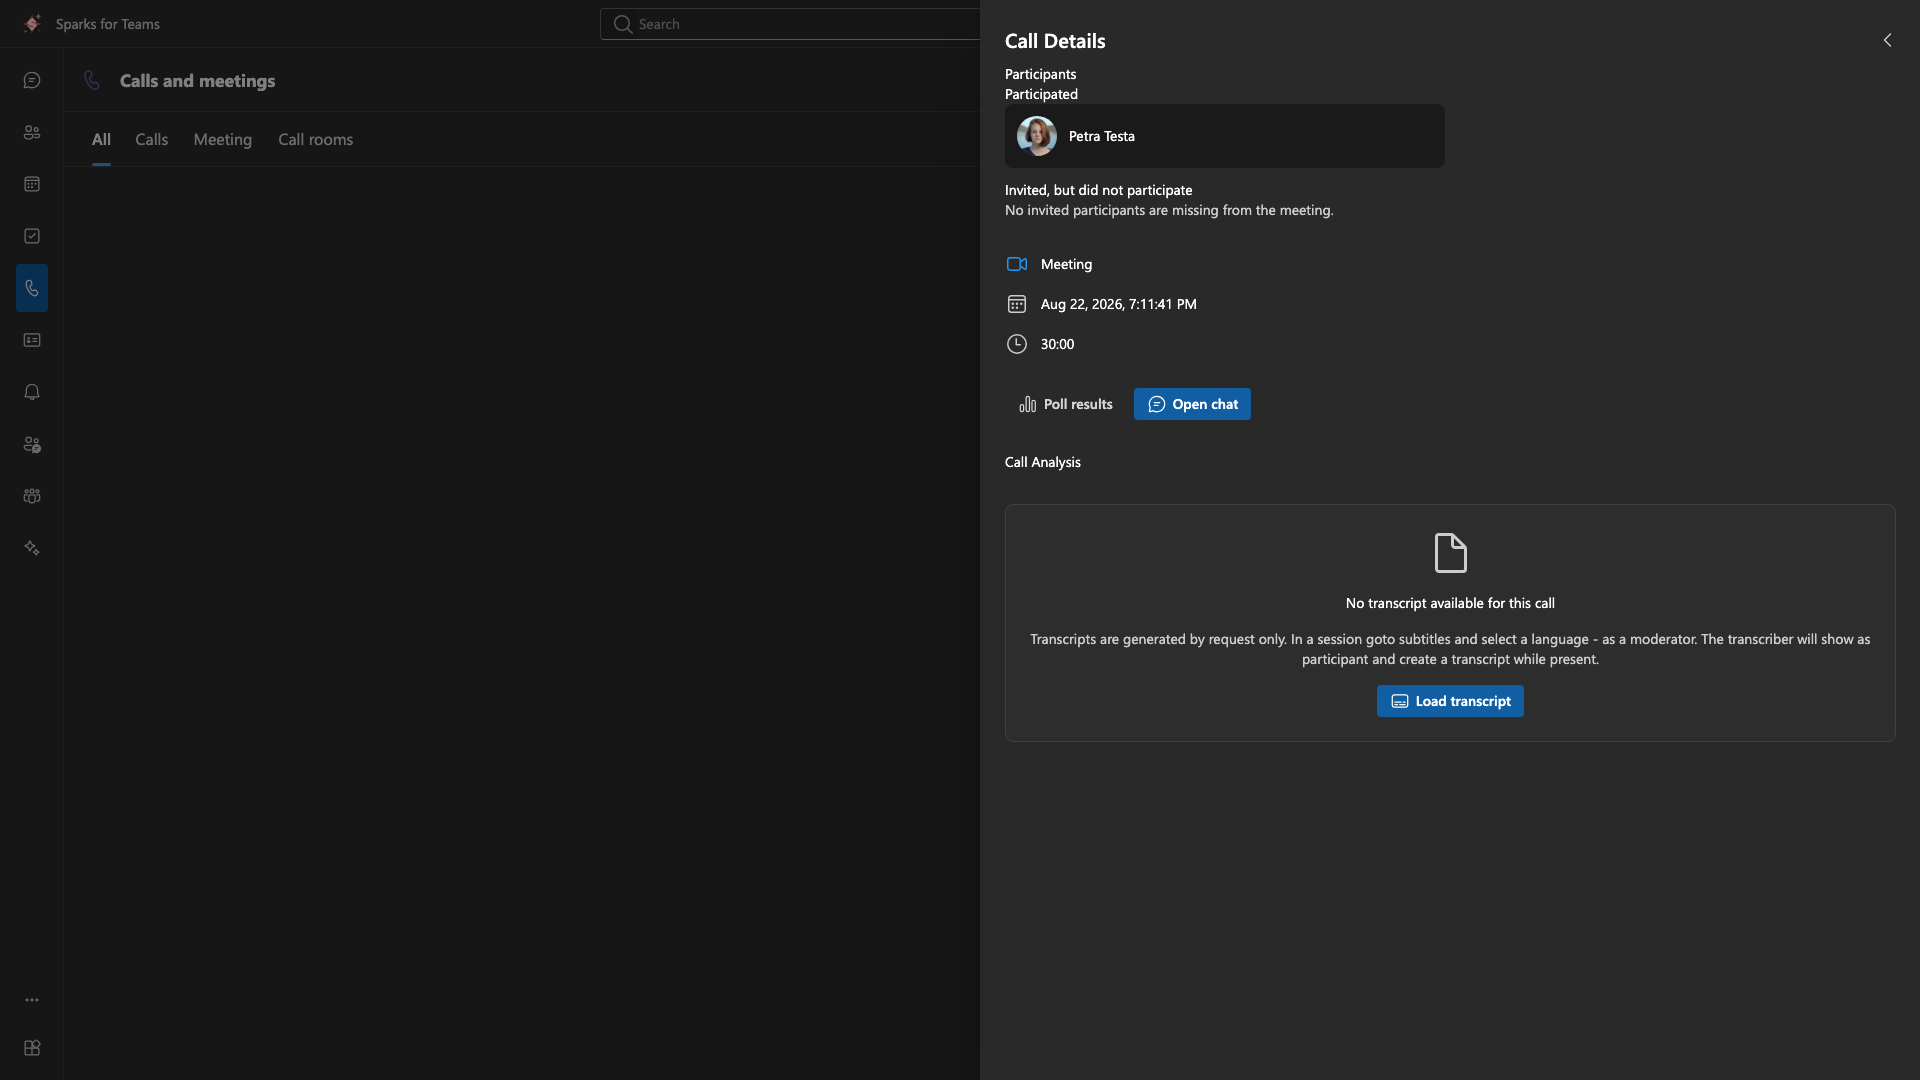
- Transcripts: For eligible calls, view stored transcripts (full text and/or AI summary and action items, depending on backend). Live captions during a call are separate from the persisted transcript in this list: only finalized lines are stored. Each entry shows the transcript for that meeting instance only (even when reusing the same Matrix room).
Requirements: Usually OIDC authentication with telephony/Conf backend; self-hosted setups may use the Vista node call log with Matrix identity—see Data backends.
📸 Screenshot:
·
Meeting Rooms
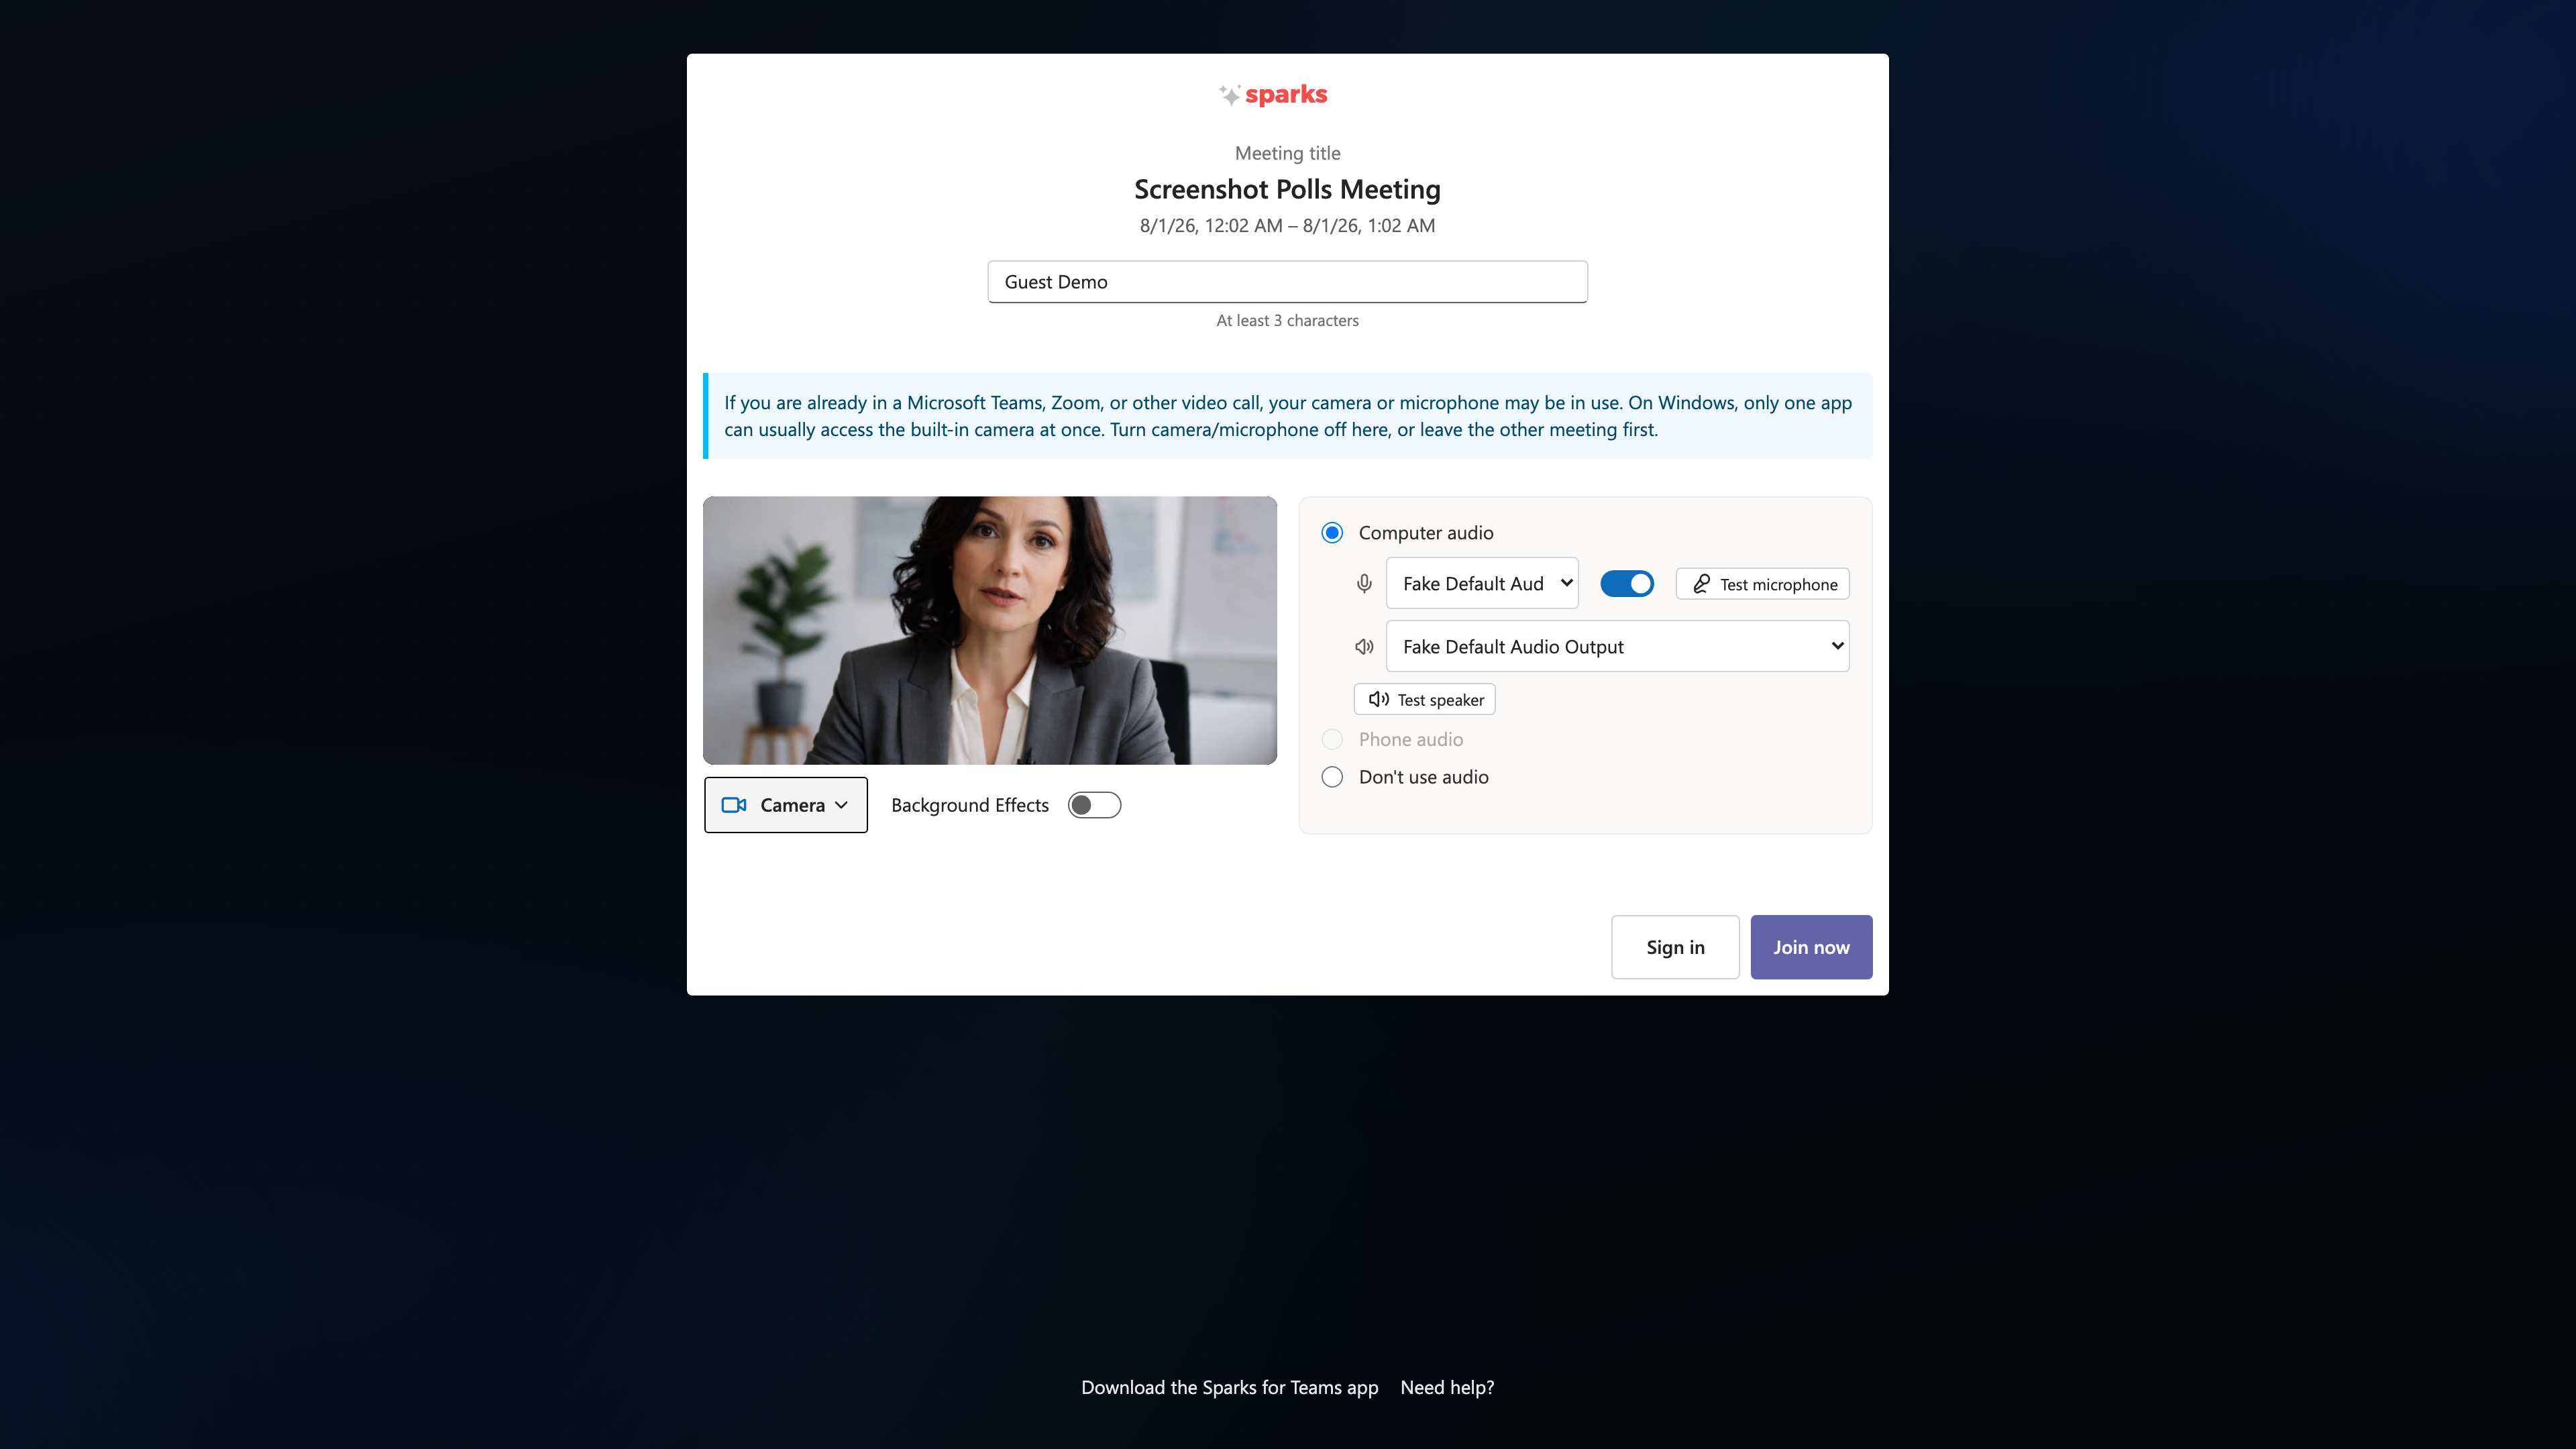
📸 Pre-Join:
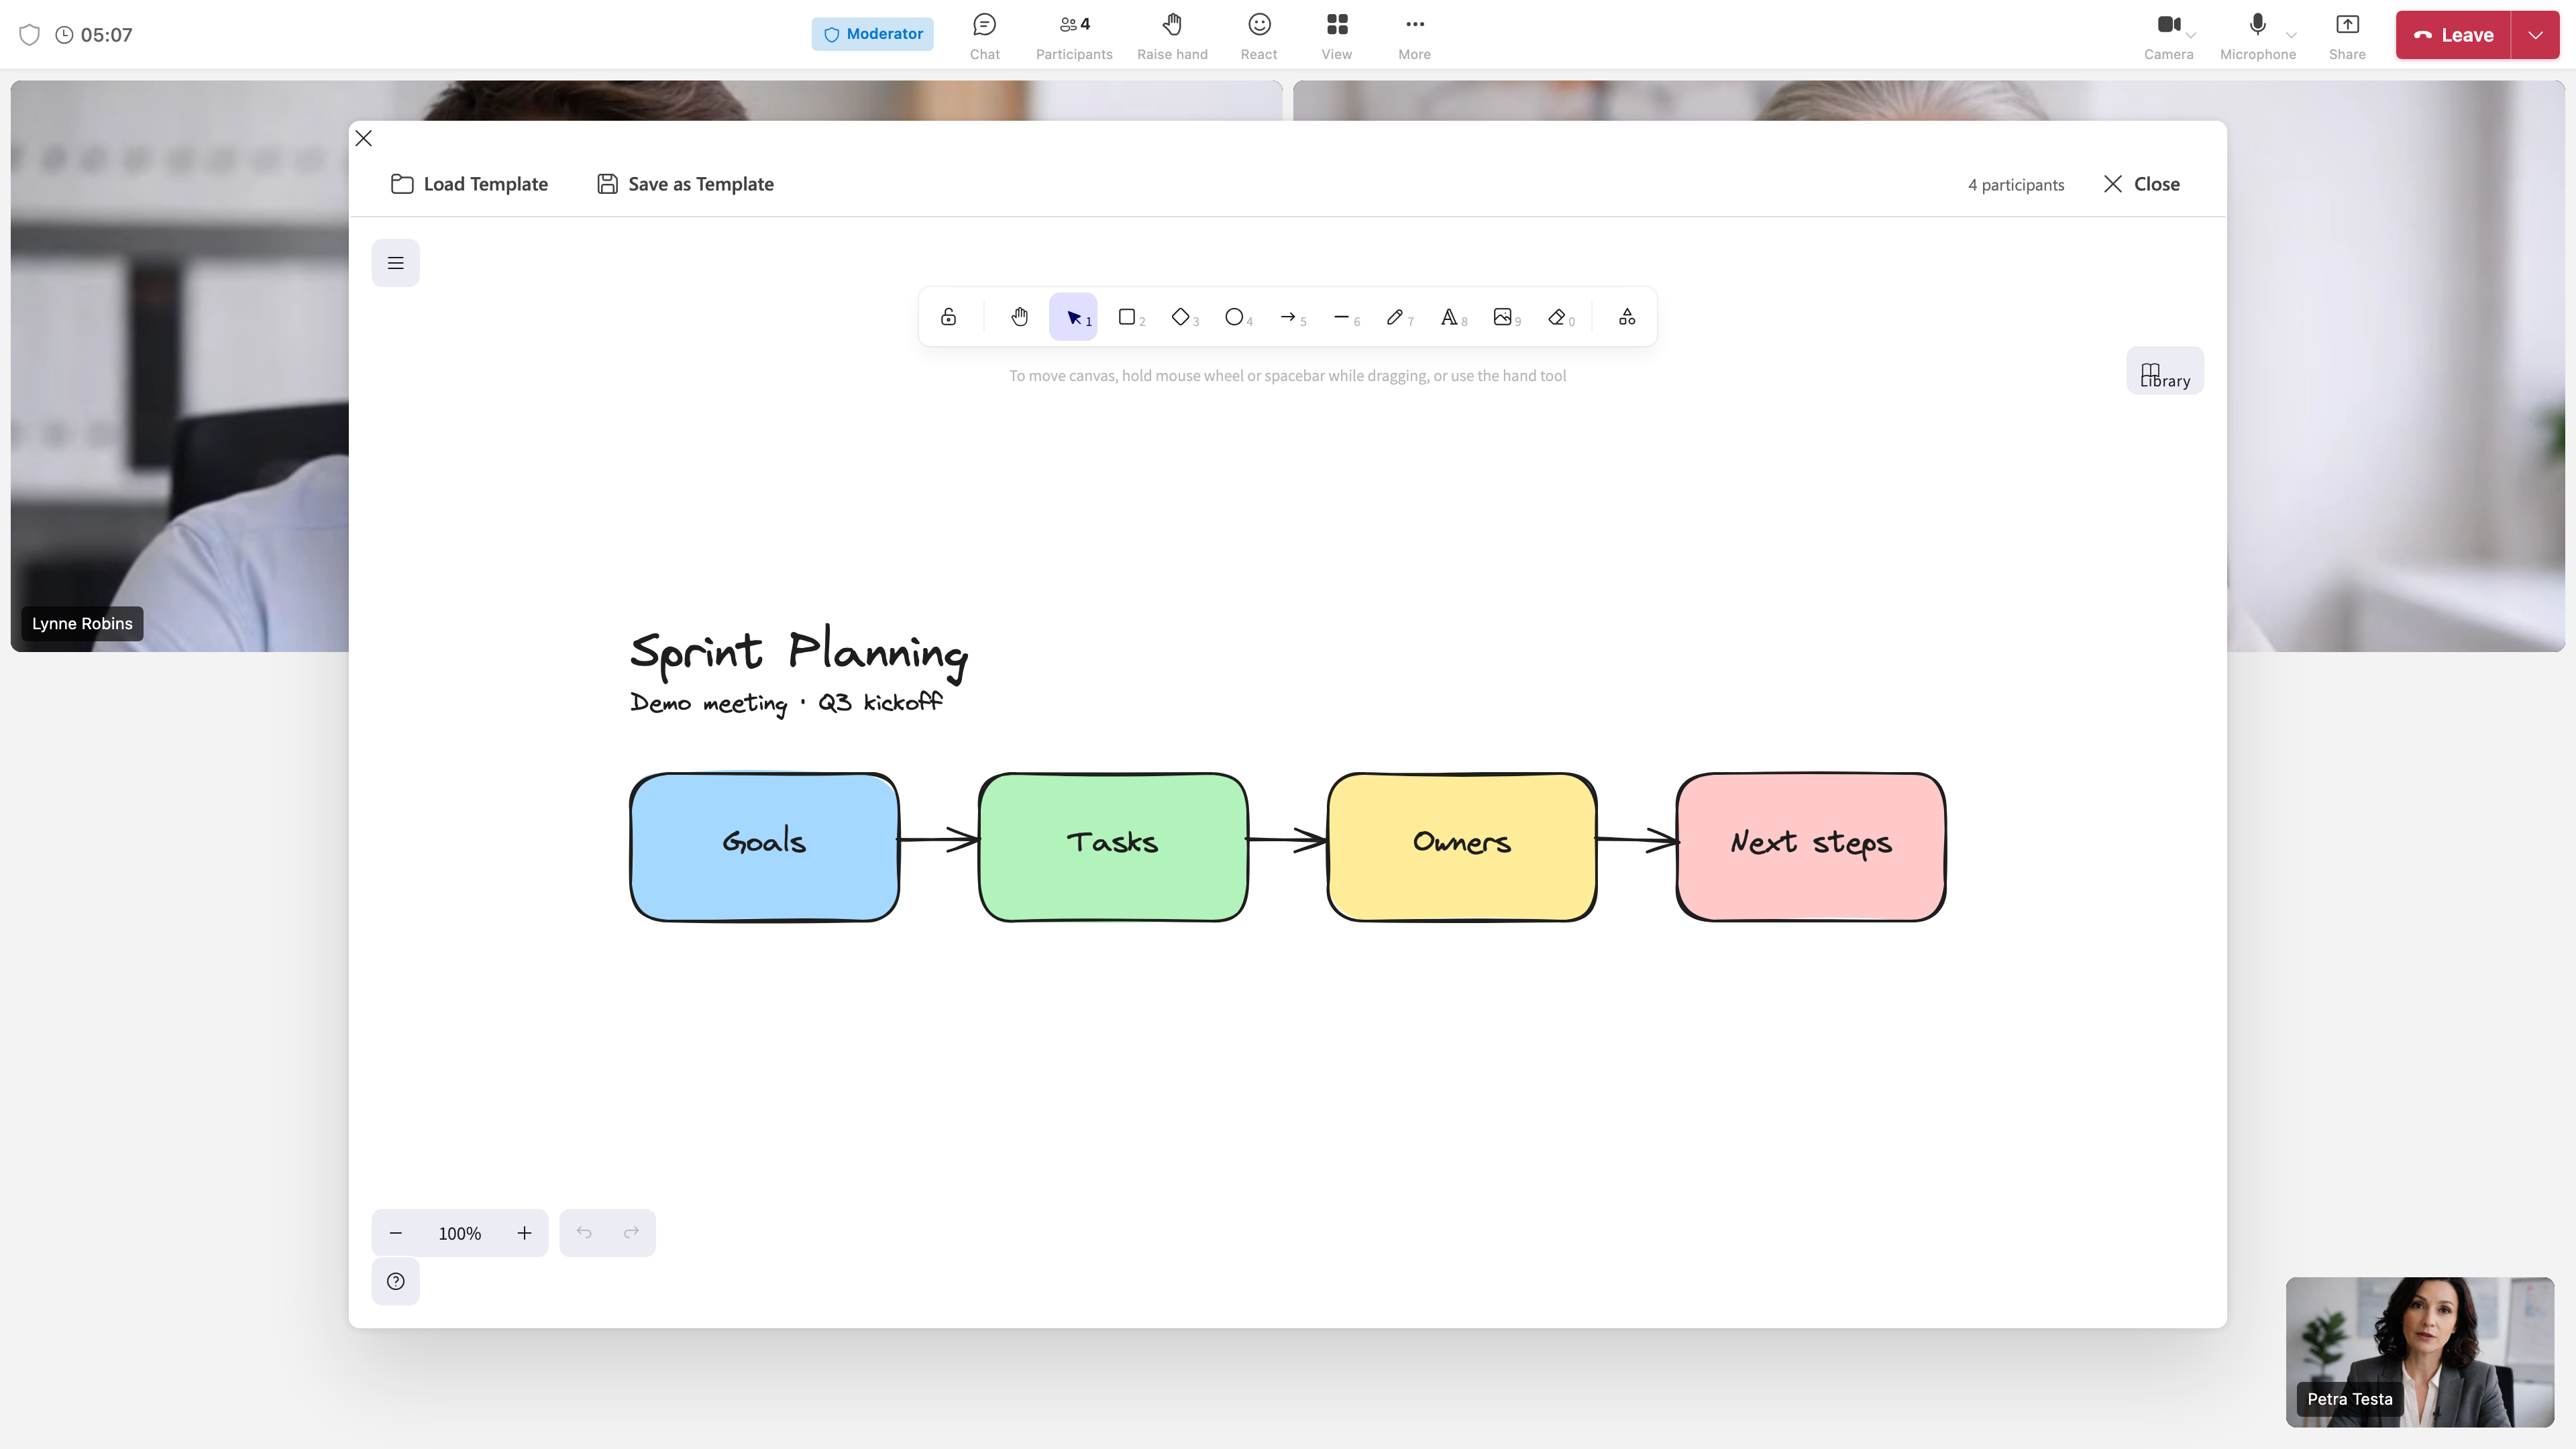
📸 Meeting room:
·
📸 More / Participants / Chat / Whiteboard:
·
·
·
Join meeting rooms for group calls and video conferences.
Joining a Meeting
-
Click "Calls" in the sidebar
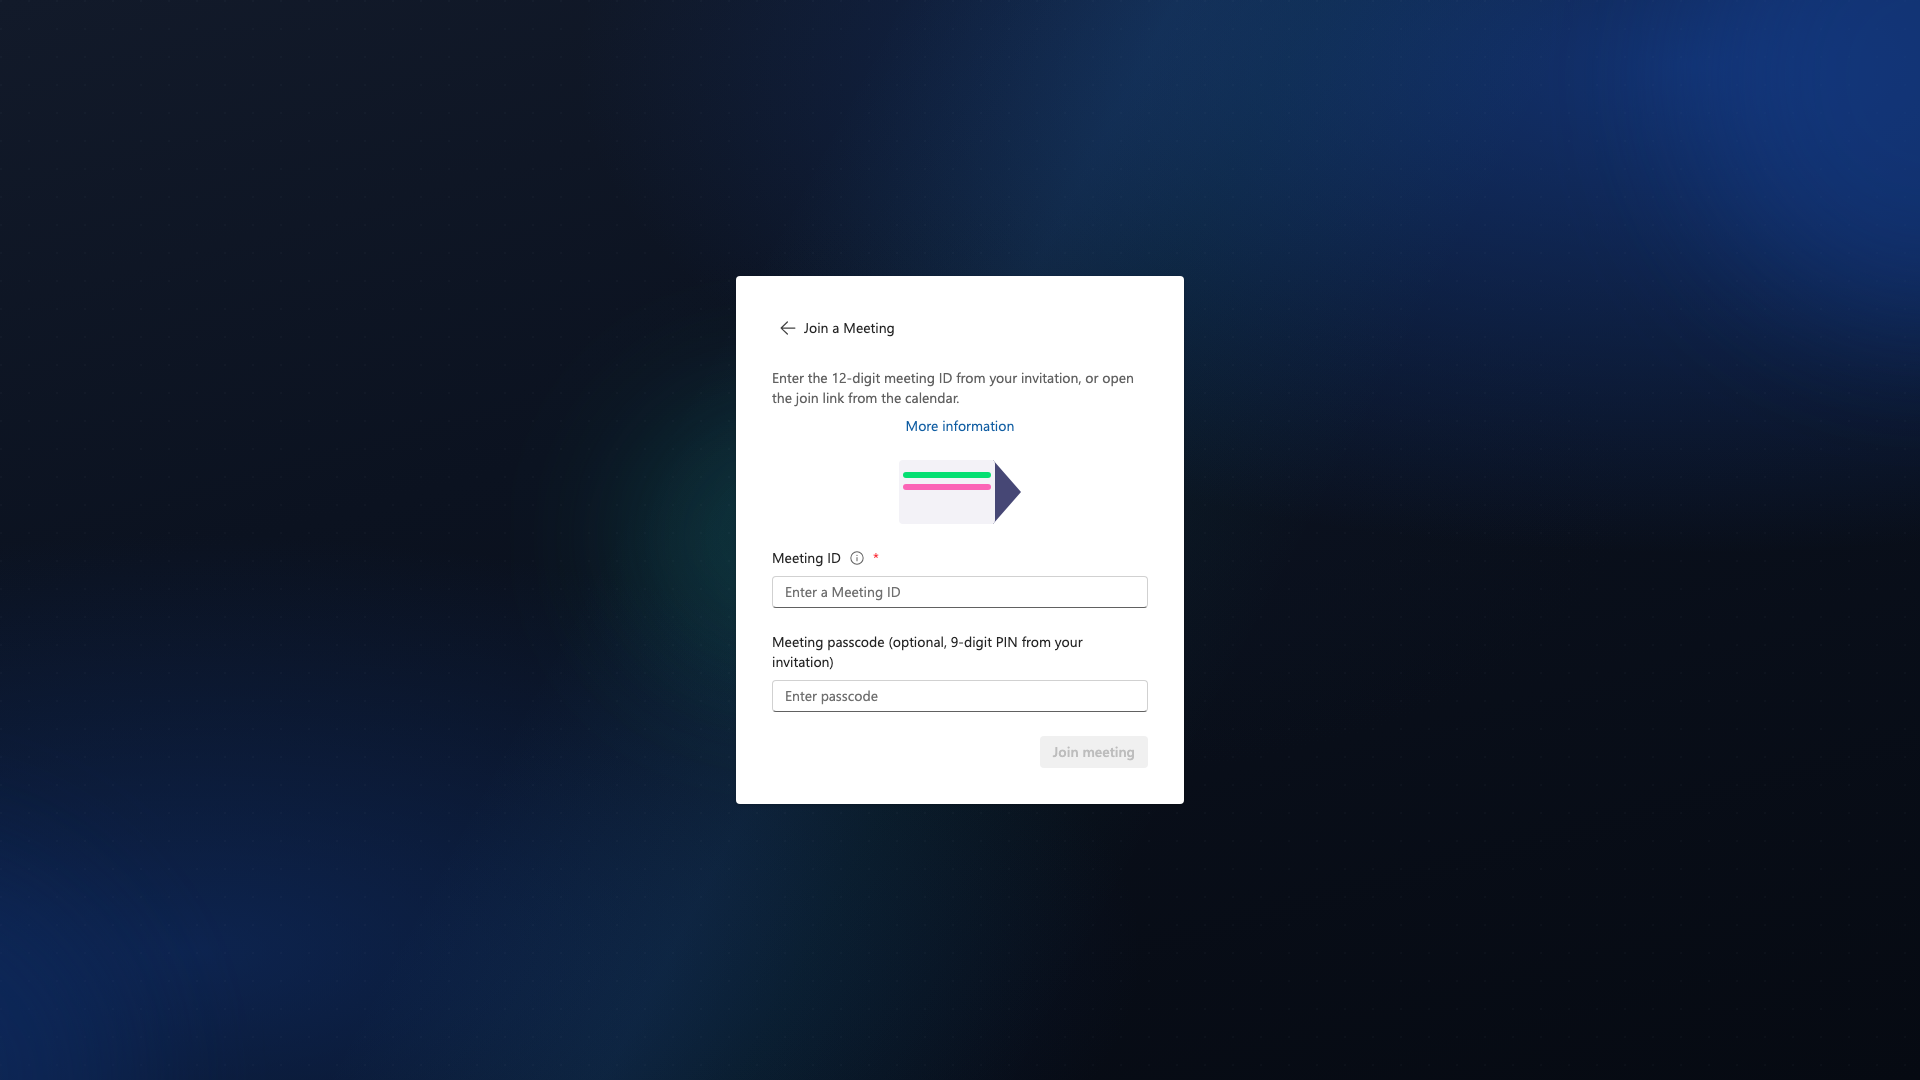
-
Click "Join Meeting" or enter a Meeting ID
-
(Optional) Enter a passcode if required
-
Click "Join"
-
On the Pre-Join page: Check your camera and microphone, optionally enable background blur
-
Click "Join Meeting" to enter
-
Allow camera and microphone access when prompted
📸 Screenshot:
📸 Screenshot:
Pre-Join Page: Before entering, you can test your camera and microphone, toggle video/audio on or off, and configure background effects. Guests may enter a waiting room first when lobby is enabled.
After leaving: A Thank you for joining! goodbye screen appears with Back to app (desktop: automatic countdown to return to the main app). Occasionally a short satisfaction question (Settings → Privacy → Surveys).
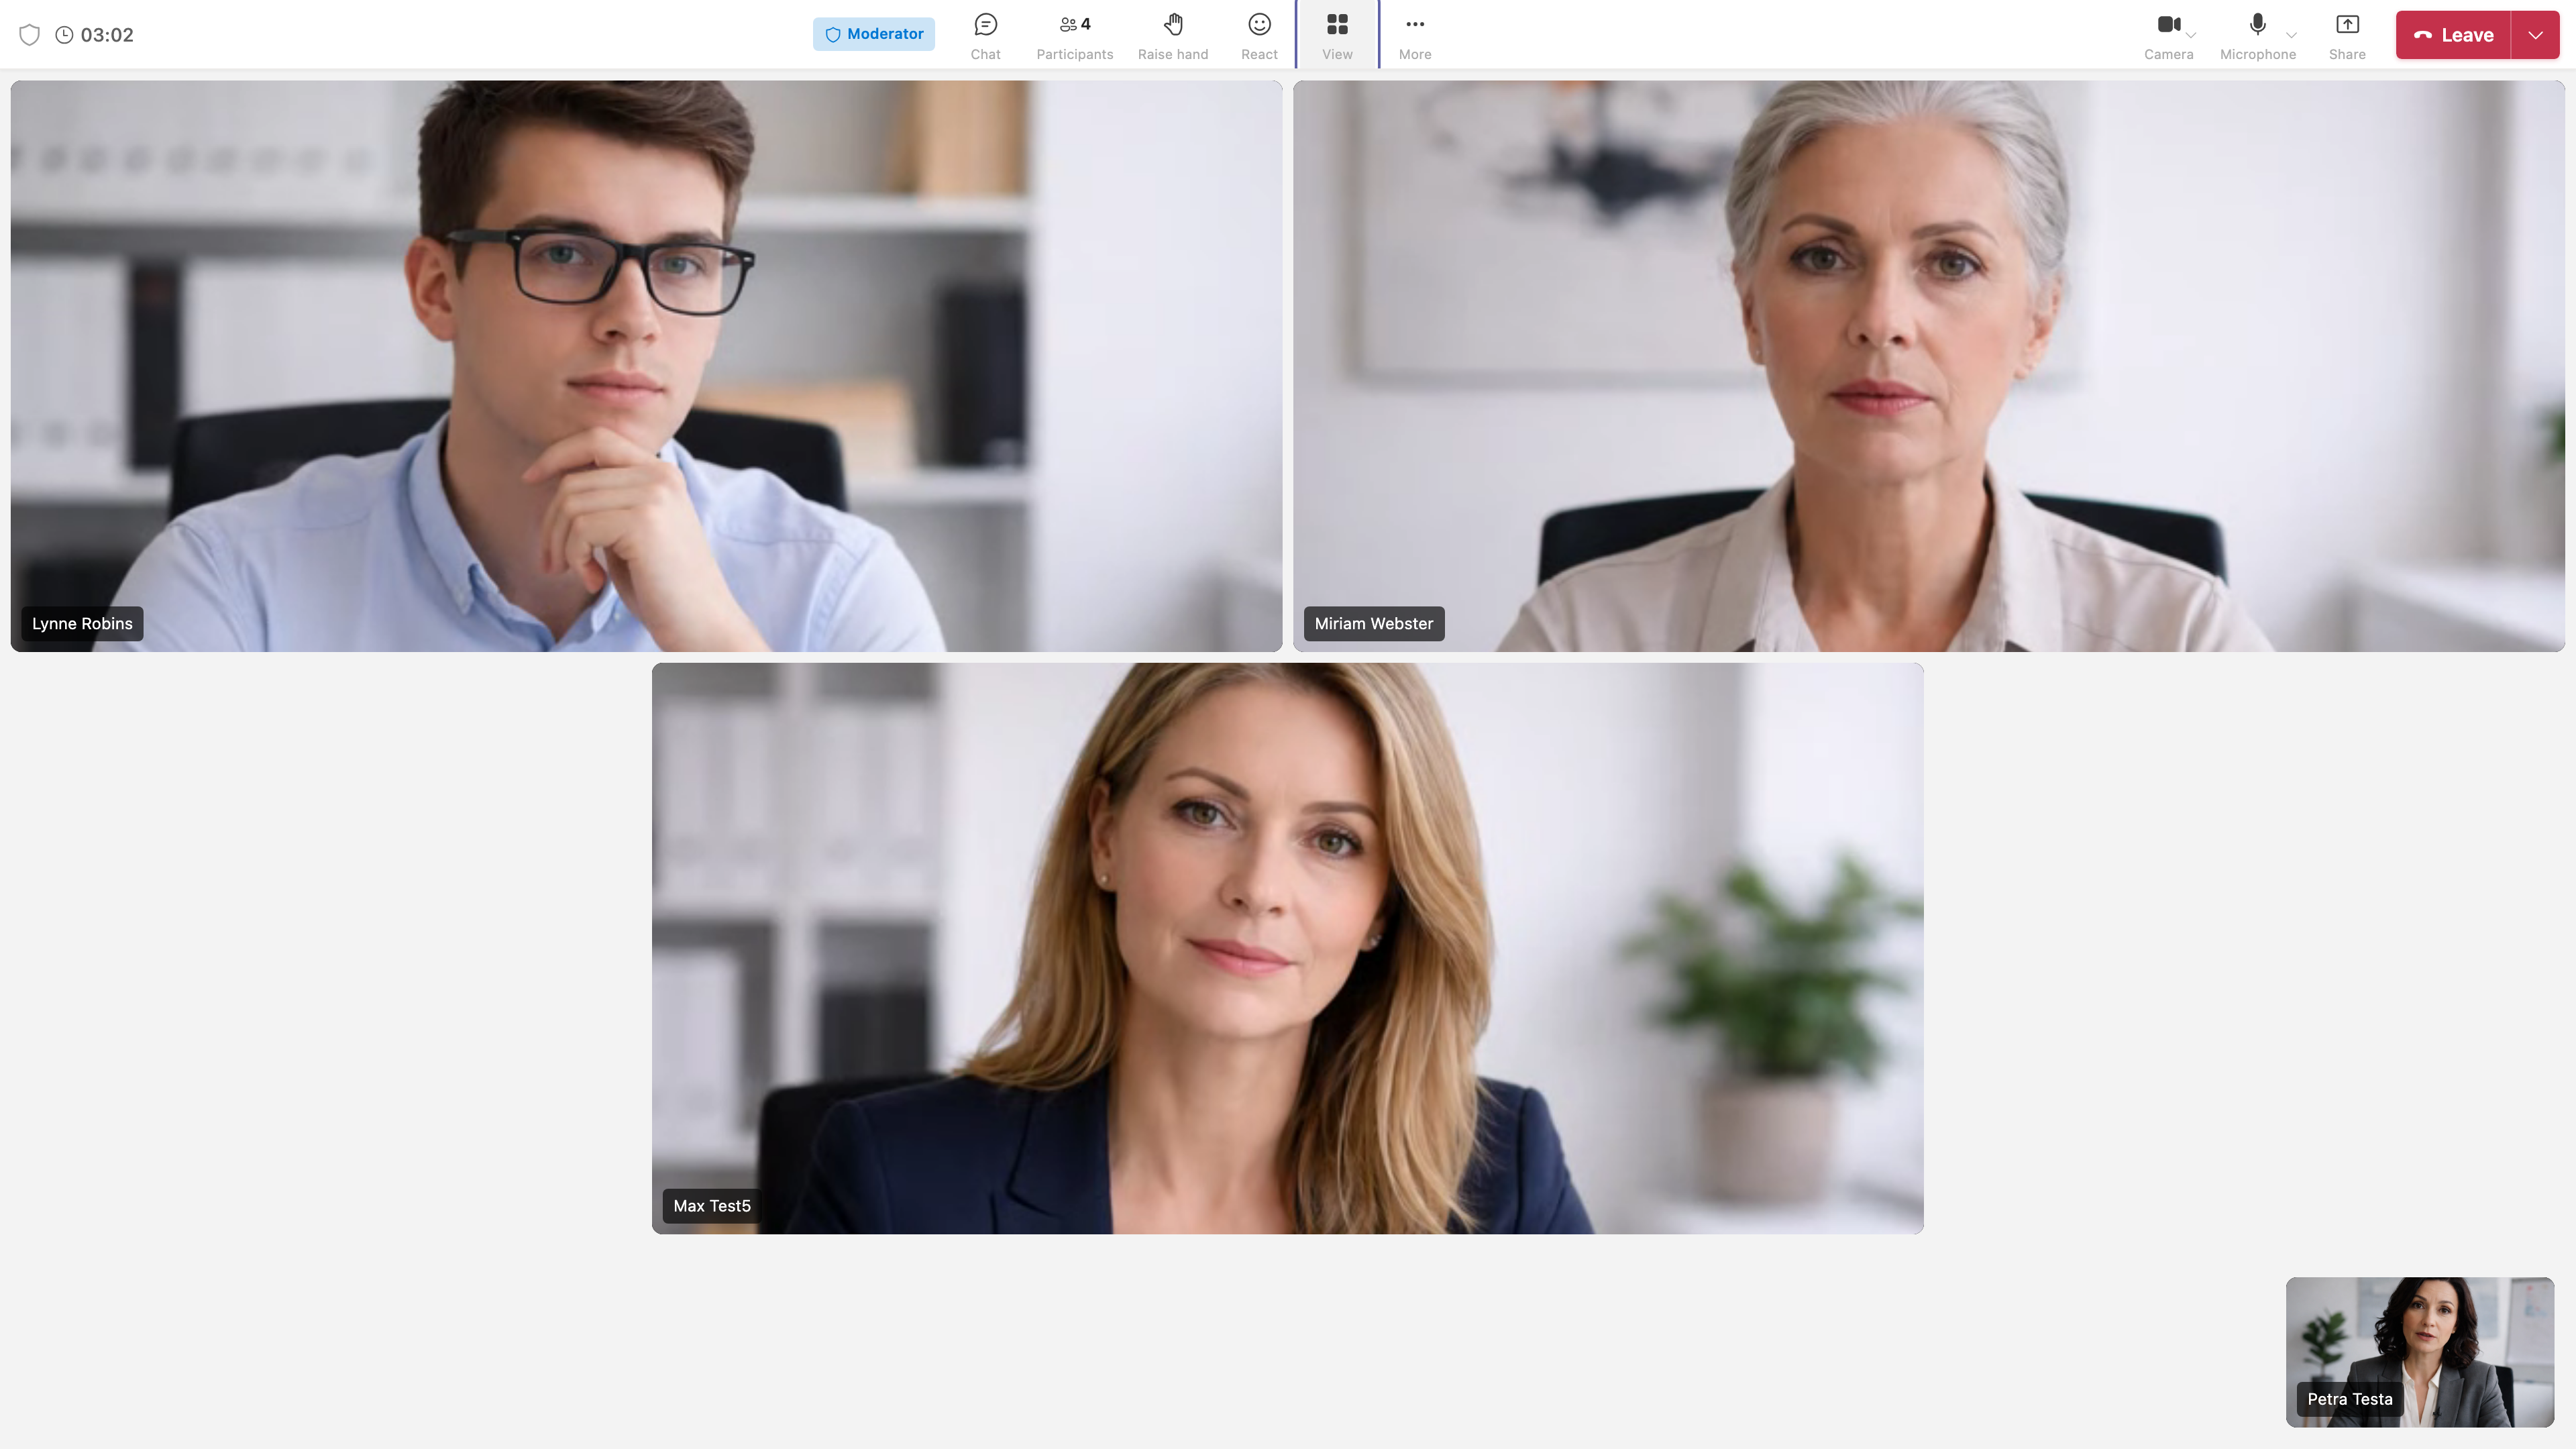
Meeting Controls
During a meeting, you have access to various controls:
-
Camera: Toggle your video on/off
-
Microphone: Mute/unmute your audio
-
Screen Share: Share your screen with participants
-
Participants: View the participants list
-
React: Send reactions (emojis) during the meeting
-
View Mode: Switch between different video layouts
-
More Options: Access additional meeting settings
-
Leave Meeting: Exit the meeting
📸 Screenshot:

Meeting Toolbar (Center Section)
Additional controls in the meeting toolbar:
- Chat: Open in-meeting chat to send messages. If the meeting is not yet linked to a Matrix room, the room is created when you open the Chat tab for the first time ("create on first access").
- Q&A: Questions and answers – ask questions and view answers from moderators
- Polls: Quick polls and questionnaires – participate (everyone); create/start/close (moderators or room moderators PL ≥ 50). Active quick polls show a stage dialog for participants. See Polls tab.
- Participants: Show/hide the participants list
- Breakout Rooms: Organizers/moderators can create and manage breakout rooms
- Raise Hand: Raise or lower your hand to get attention
- React: Send emoji reactions (thumbs up, heart, laugh, etc.) visible to all
- View: Switch between Gallery (grid) and Speaker view
- Whiteboard: Open a collaborative whiteboard (Excalidraw) for drawing and notes
- Background Effects: Blur your background or use a custom image (from Video/More menu)
- Mini window: floating controls above other windows (Settings → General → Meeting)
- Pointer on screen share: moderators turn Pointer on; click/drag marks for everyone; presenter overlay in the desktop app
Moderator-Only Features
If you are the meeting organizer or moderator:
- Add participants: In the participants (people) panel, invite others via copy link, email, Microsoft Teams chat, or Matrix room invite when the meeting is linked to a Matrix room. Phone invite may be hidden depending on your organization.
- Breakout Rooms: Create rooms, assign participants, open/close rooms
- Controls Menu: Recording (requires server setup), Meeting timer
- Participant Actions: Pin, spotlight, or remove participants
Participant Management
-
View Participants: Click "Show participants" to see all attendees
-
Pin Video: Pin a participant's video to focus on them
-
Unpin Video: Remove pinning to return to grid view
-
Spotlight: Moderators can spotlight a participant for everyone
-
Speaker Stats: View speaking time statistics (who spoke how long)
-
Close Participants List: Hide the participants panel
📸 Screenshot:
Meeting Features
- Raise Hand: Raise your hand to get attention
- Video Layouts: Gallery (grid of all participants) or Speaker (large active speaker)
- Whiteboard: Collaborative drawing with Excalidraw – all participants see the same canvas
- Chat, Q&A, Polls: Available when the meeting is linked to a Matrix room (the room is created on first use if not yet linked)
- Background Effects: Blur or custom background (via Video button → Background effects)
- Mini window and pointer/markings on screen share: Join meeting
- Device Selection: Change camera, microphone, or speaker in the More menu
- Recording: Requires server-side recording export to be configured – moderators see the option when available
- End-to-End Encryption: For 1:1 calls, E2EE can be enabled in Privacy settings. For meetings, E2EE depends on the meeting setup (when available, a shield icon indicates encrypted connection).
Screen Sharing
- Click the "Share screen" button
- Choose what to share:
- Entire screen
- Specific application window
- Browser tab (web version)
- Click "Share"
- Others will see your shared content
- Click "Stop sharing" to end screen share
Moderators can turn Pointer on: click for a named laser, drag for a short marking, Clear markings to wipe strokes. In the desktop app the presenter also sees clicks on the real screen. This is not remote control.
Meeting Tips
- Test your camera and microphone before joining
- Use a stable internet connection for best quality
- Mute yourself when not speaking to reduce background noise
- Pin important participants for better focus
- Use screen sharing for presentations and collaboration
- Use the whiteboard for brainstorming and visual notes
- Background blur can improve video quality in busy environments
When Leaving: You may be asked to complete a short feedback survey. This helps improve the meeting experience.
📸 Screenshot:
Settings
Access settings by clicking the Settings icon in the sidebar or your profile menu.
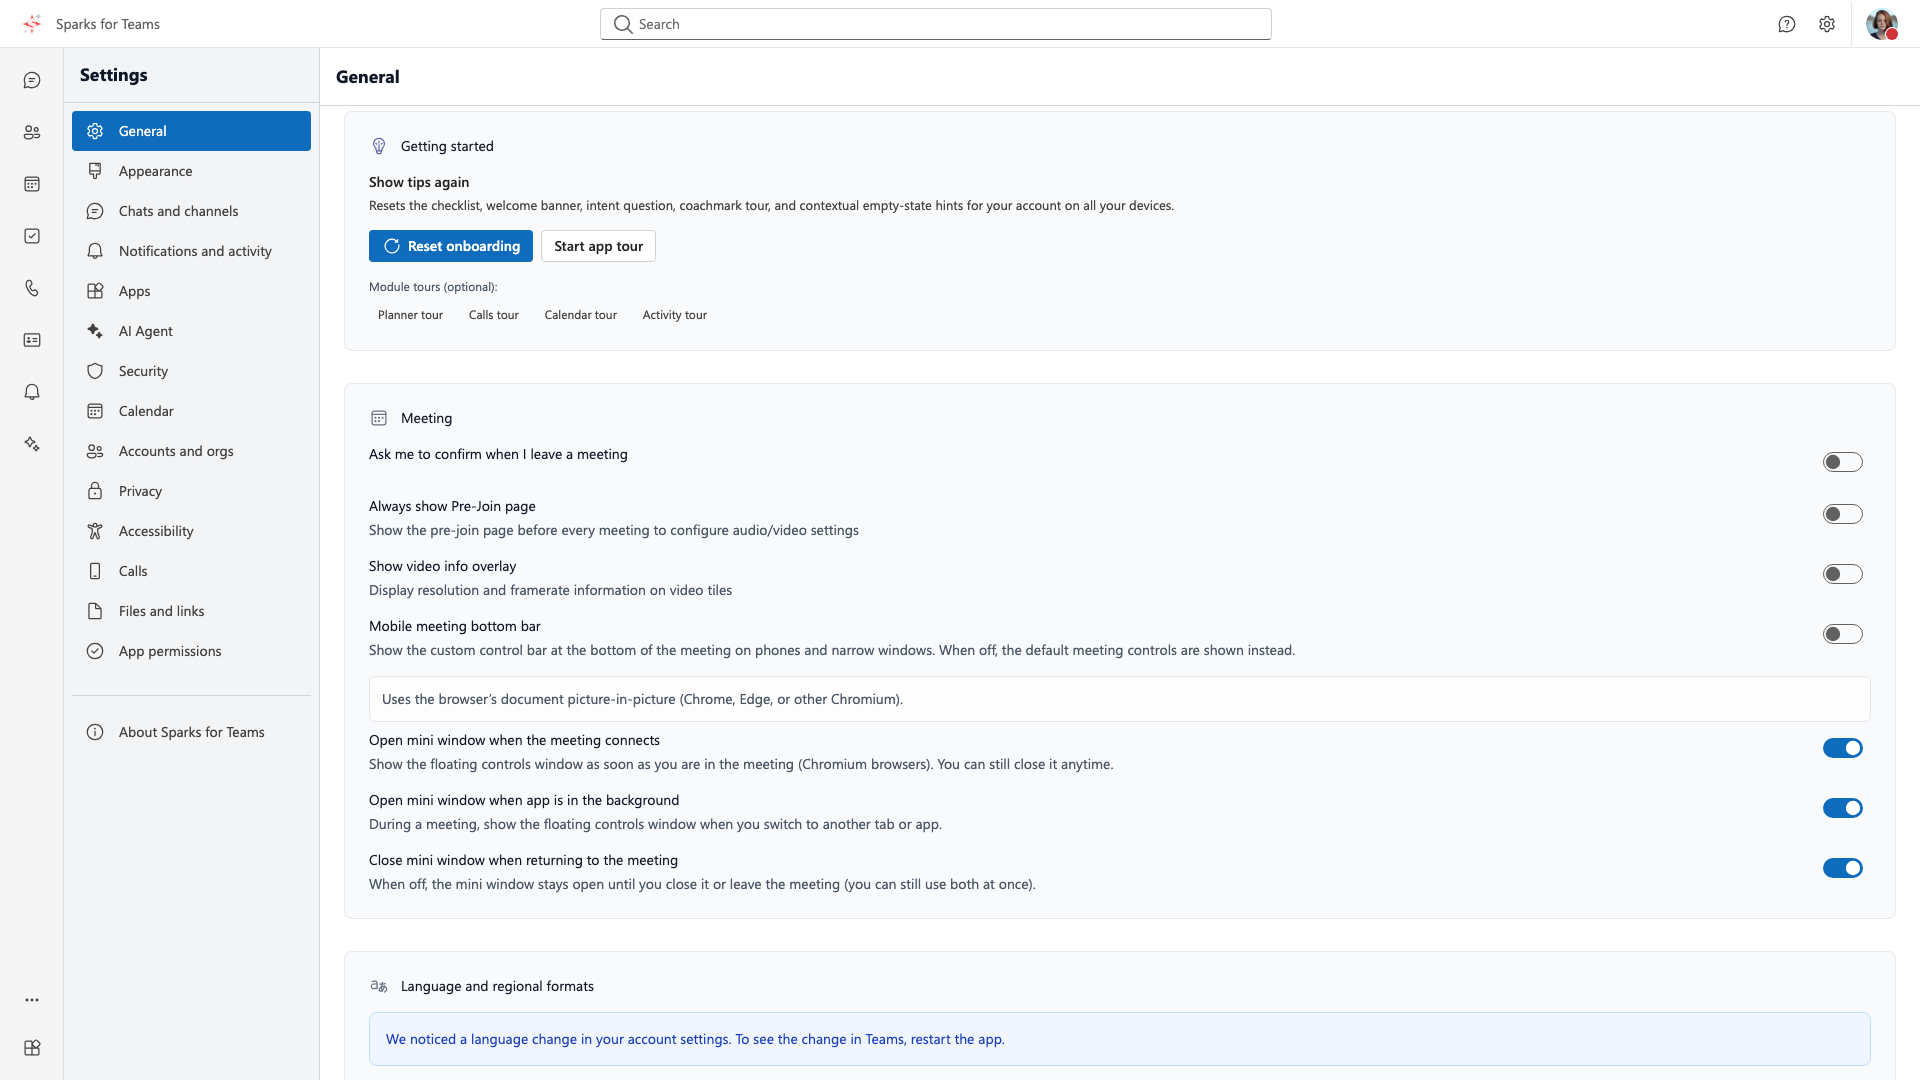
General Settings
-
Language: Choose application language
- Currently supported: English, German
- More languages may be available as translations are completed
- Language changes apply immediately
-
Date Format: US (MM/DD/YYYY) or European (DD/MM/YYYY) format
-
Time Format: 12-hour (AM/PM) or 24-hour format
-
First Day of Week: Monday or Sunday
-
Number Format: US or European number formatting
-
Device permissions (desktop app): camera, microphone, notifications, screen recording
-
Meeting mini window: auto-open on connect/background, close when returning to the meeting
📸 Screenshot:
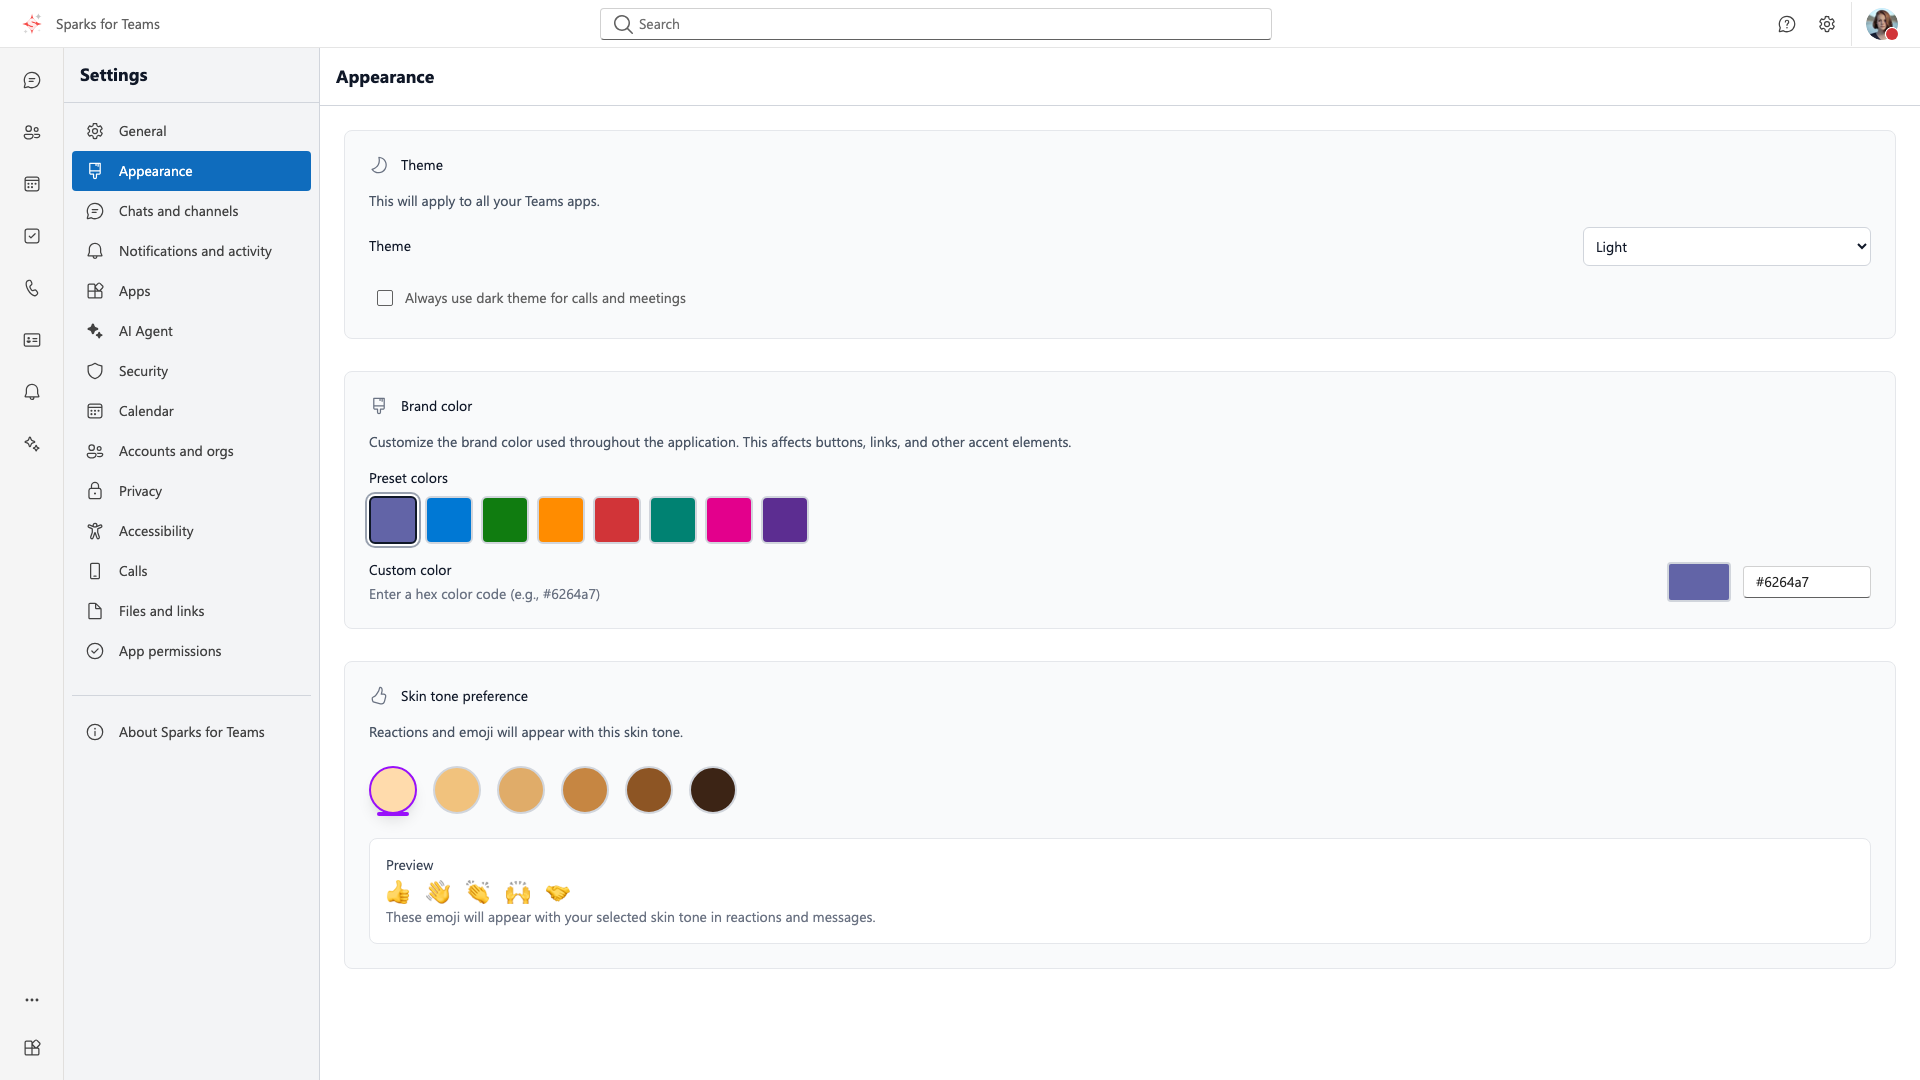
Appearance
-
Theme: Light, Dark, or System
-
Brand Color: Choose accent color
-
Font Size: Adjust text size
-
Density: Compact, Normal, or Comfortable
📸 Screenshot:
Chat Settings
-
Message Formatting: Rich text or plain text
-
Emoji Skin Tone: Default skin tone for emojis
-
Read Receipts: Enable/disable read indicators
-
Typing Indicators: Show when others are typing
-
Element / Matrix native calls: Auto-decline with Sparks hint or notify only (legacy VoIP)
-
Element Call (MatrixRTC): Ignore · Decline · Notify only · Ring and answer in Sparks (default: ignore). Details: Element Call and federation
-
Separate Matrix and Microsoft: Show Matrix and Microsoft apps separately in sidebar
📸 Screenshot: Chat settings
Notifications
-
In-app toasts (Teams-style) for messages and meeting reminders; position/size in Settings. Desktop in background: overlay window (Tauri)
-
Desktop Notifications: Enable/disable notifications for messages and reminders (calls use the call dialog)
-
Sound Notifications: Enable/disable sound alerts
-
Notification Settings: Configure what triggers notifications
-
Calendar notifications (email, opt-in): Calendar invites by email, reminder for pending Matrix room invites, missed chat messages (digest for Matrix and MS chats with configurable frequency). Details: Settings – Email notifications
📸 Screenshot: Notification settings
Privacy
-
Do Not Disturb: Manage who can reach you when status is "Do Not Disturb"
-
Priority Contacts: Click "Manage Priority Contacts" to open the list; priority contacts get notifications even when you are in Do Not Disturb
-
Blocked Contacts: Click "Manage Blocked Contacts" to block or unblock contacts; syncs with the Matrix ignore list (Element). Blocked contacts cannot call you; their messages/calls are ignored in Sparks
-
Surveys (chat/channel polls and the post-meeting satisfaction question), Diagnostic Data, E2EE Calls, Optional Connected Experiences: See Privacy Help
📸 Screenshot: Privacy settings
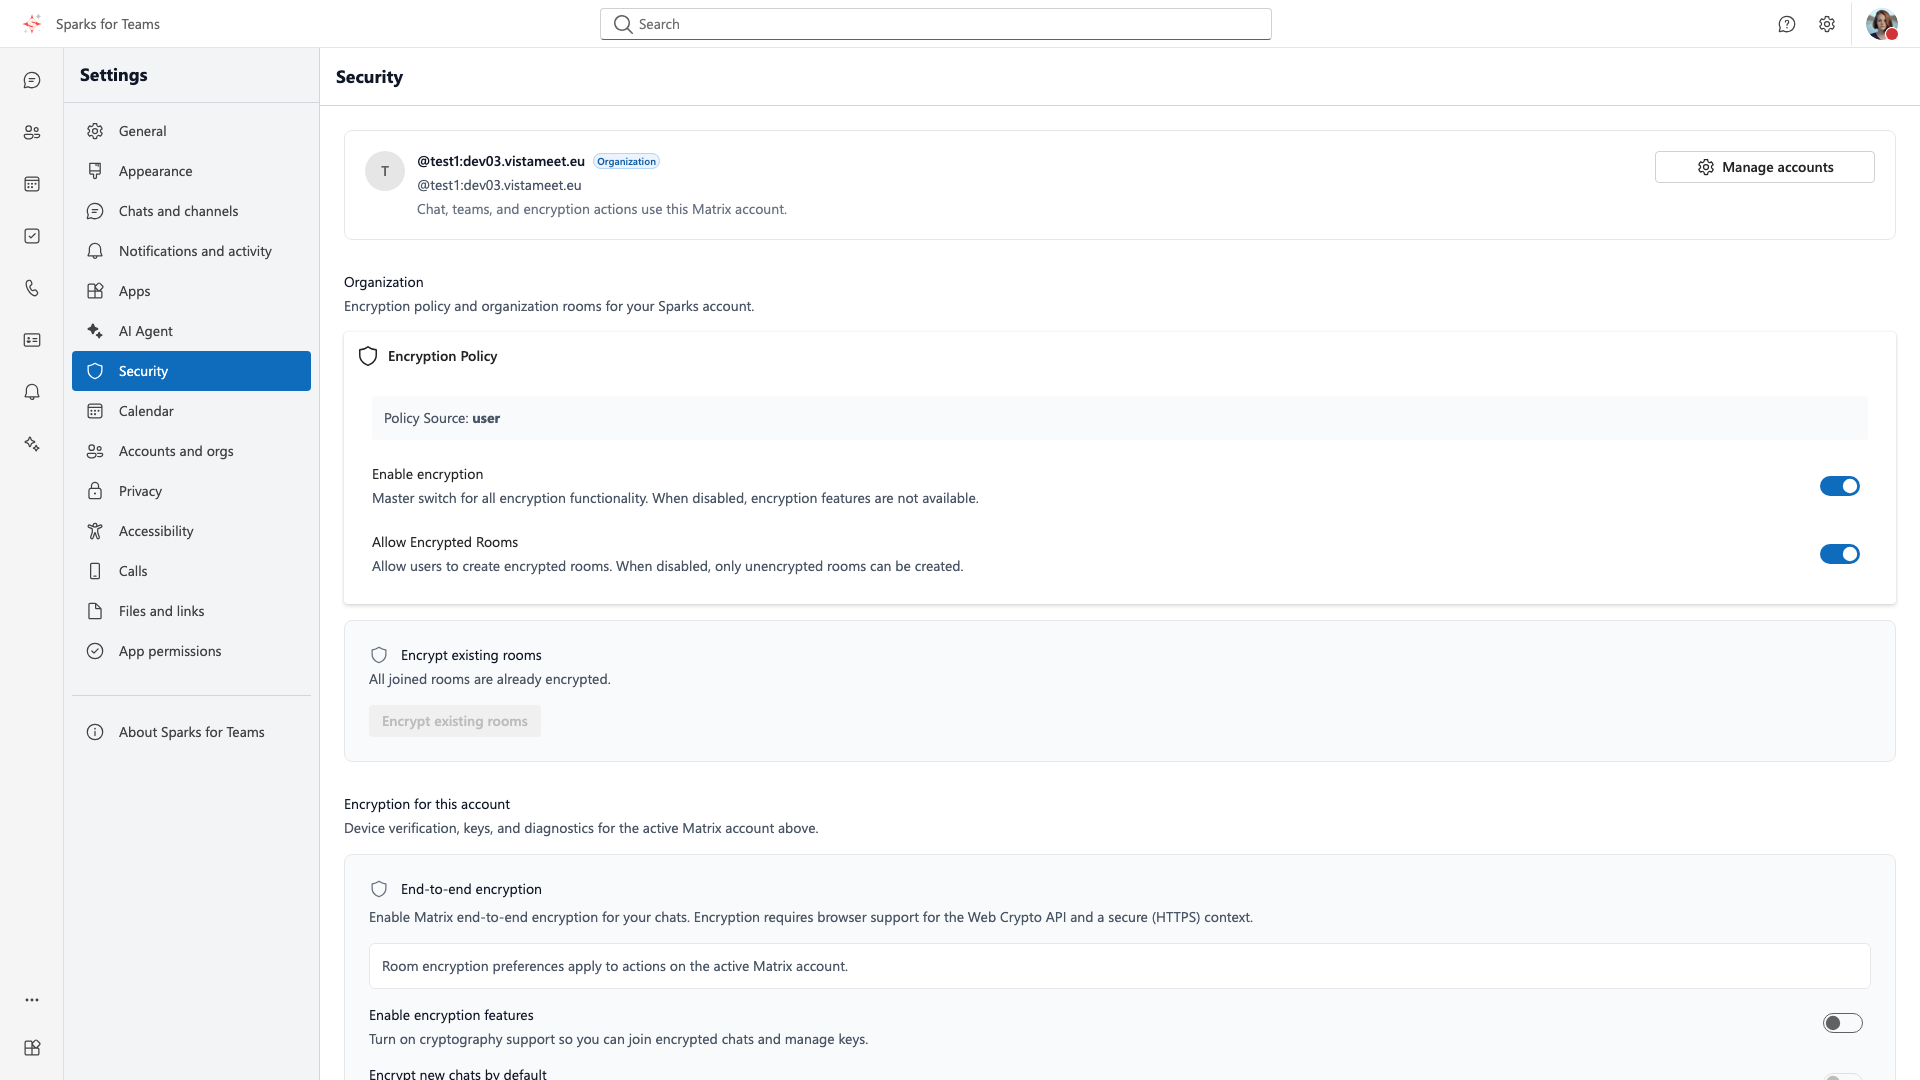
Security
-
Encryption Status: View encryption setup status
-
Device Management: View and manage your devices (also accessible from User Profile)
-
Key Backup: Set up and manage encryption key backup
-
Cross-Signing: View cross-signing status
-
User Profile: Quick access to profile and device management
📸 Screenshot:
Keyboard Shortcuts
-
View all available keyboard shortcuts
-
Customize shortcuts to your preference
-
Learn productivity shortcuts
📸 Screenshot: Keyboard shortcuts dialog
Provider Accounts & Organisations
-
Calendar: Connect Microsoft, Nextcloud (CalDAV), or Open-Xchange for calendar data
-
Contacts: Connect Microsoft, Nextcloud (CardDAV), or Open-Xchange for contacts
-
Tasks: Connect Microsoft Planner, Nextcloud, or Open-Xchange for tasks
-
Storage: Connect Microsoft OneDrive or WebDAV for file storage
-
Default Provider: Set which provider is used by default when multiple are connected
-
Use "Connect" to add new provider accounts (e.g. Nextcloud, OX)
📸 Screenshot: Provider accounts settings
Account Settings
-
Microsoft Account: View and manage Microsoft account
-
Matrix Account: View Matrix account information
-
Logout: Sign out of your accounts
📸 Screenshot: Account settings
Security & Encryption
Encryption Overview
SPARKS uses Matrix's end-to-end encryption (Rust Crypto) to secure your messages. Encryption is set up automatically for all users, ensuring your messages are protected from the start. The recovery key is stored securely on the server so you don't need to manage it yourself.
Automatic Encryption Setup (First Device)
When you first log in, encryption is configured automatically in the background:
- Secret Storage: Your encryption keys are stored securely
- Cross-Signing: Your devices are automatically cross-signed for security
- Key Backup: Your keys are automatically backed up
- Recovery Key: Stored securely on the server (AES-256-GCM encrypted)
No user interaction required - everything happens automatically!
Logging In on a Second Device
When you sign in on an additional device (another browser or the desktop app):
- Your recovery key is automatically fetched from the server
- Secret Storage is opened with the existing key
- Your encryption keys are restored from backup
- The new device is automatically verified via cross-signing
- All your older messages are readable immediately
No manual action needed - your messages are available on the new device right away.
When Manual Action is Needed
You may need to set up encryption manually if:
- Your organization uses "strict" device verification policy
- The automatic server fetch fails (rare)
- You want to manually verify a specific device
If your organization has disabled Matrix E2EE entirely (Account → Team → Security policies), encryption setup is not available and related options are hidden in the app.
Manual Encryption Setup
If automatic setup didn't complete, you can set it up manually (only when Matrix E2EE is allowed by your organization):
-
Go to Settings → Security
-
Click "Set Up Encryption" or "Open Setup Wizard"
-
Follow the encryption setup wizard:
- Set up secret storage
- Create recovery key (displayed in Element-compatible format)
- Set up cross-signing
- Enable key backup
📸 Screenshot: Encryption setup wizard
Recovery Key
Your recovery key is a backup key that allows you to restore your encryption on a new device.
Default behavior: The recovery key is stored securely on the SPARKS server. You don't need to save it yourself. Optionally, you can note it down as an additional backup.
Strict mode (if enabled by your admin): The recovery key is NOT stored on the server. You must save it yourself when it's displayed during setup. The wizard will require you to confirm that you saved it before proceeding.
Organization-wide E2EE off (admin option): Matrix encryption features and recovery-key setup are disabled for all members; see Team management – Security policies.
The recovery key is in Element-compatible format (starts with "EsSS...") and can be entered in Element or any Matrix client.
You can view your recovery key at any time:
- Go to Settings → Security → Key Backup
- Click "View Recovery Key"
- Copy and save it securely
Device Verification
By default, new devices are verified automatically when you log in. If manual verification is needed:
- Go to Settings → Security → Device Management
- View all your devices
- Verify new devices using:
- SAS Verification: Compare emoji or numbers with another device
- QR Code: Scan QR code with another device
Verifying Other Users
When chatting with someone for the first time:
- You may see a verification request
- Choose verification method (SAS or QR code)
- Compare codes or scan QR code
- Click "Verify" if codes match
Key Backup
Automatic Backup
Key backup is set up automatically during encryption setup. Your room keys are continuously backed up so they can be restored on new devices.
Manual Backup Restoration
If automatic restoration didn't work:
- Go to Settings → Security → Key Backup
- Click "Restore Backup"
- Enter your recovery key
- Wait for restoration to complete
Organization Security Policies
Your organization administrator may configure security policies that affect encryption behavior:
| Policy | Effect |
|---|---|
| Matrix E2EE On (default) | Encrypted rooms and crypto setup available |
| Matrix E2EE Off | No Matrix E2EE for the organization; related app options are hidden |
| Comfortable (when E2EE is on) | Recovery key stored on server, automatic device setup |
| Strict (when E2EE is on) | No server-side key storage, manual verification required for each device |
These settings are managed in the SPARKS Account Admin portal and apply to all members of your organization.
Keyboard Shortcuts
Navigation Shortcuts
-
Ctrl+K (Cmd+K on Mac): Open command palette / search
-
Ctrl+Period (Cmd+Period on Mac): Open settings
-
Escape: Close dialogs, cancel actions
📸 Screenshot: Keyboard shortcuts reference
Chat Shortcuts
- Ctrl+Shift+M (Cmd+Shift+M on Mac): Focus message input
- R: Reply to the hovered / focused message (when not typing in the composer)
- Ctrl+Up/Down: Navigate between rooms
- Ctrl+F: Search in current room
General Shortcuts
- Ctrl+, (Cmd+, on Mac): Open settings
- Ctrl+/: Show keyboard shortcuts help
Customizing Shortcuts
-
Go to Settings → Keyboard Shortcuts
-
Click on a shortcut to customize
-
Press your desired key combination
-
Click "Save"
📸 Screenshot: Customize shortcuts dialog
Troubleshooting
Login Issues
Problem: Cannot log in with Microsoft account
Solutions:
-
Check your internet connection
-
Verify your Microsoft account credentials
-
Clear browser cache and cookies (web version)
-
Check if pop-ups are blocked
-
If Entra shows
redirect_uri_mismatchor rejectshttp://tauri.localhost: this is an IT task — see Connect Microsoft 365 to Sparks (Entra). Do not registerhttp://tauri.localhost/…. -
Mobile App: Check if browser pop-ups are allowed in app settings
-
Web App: Try a different browser or incognito mode
📸 Screenshot: Login error message
Encryption Issues
Problem: Encryption not working
Solutions:
-
Check if automatic setup completed:
- Go to Settings → Security
- Look for encryption status indicators
-
If automatic setup failed:
- Go to Settings → Security → Encryption Validation
- Run validation tests
- Check error messages for specific issues
-
For migration issues:
- Wait for migration to complete (may take time for large accounts)
- Check for migration progress indicators
- Don't interrupt the migration process
-
General troubleshooting:
- Ensure you're using HTTPS (web) or secure context
- Try refreshing the page/app
- Check browser/app permissions
- Try clearing encryption data and re-setting up (last resort)
📸 Screenshot: Encryption validation results
Search Not Working
Problem: Advanced search not finding messages
Solutions:
- Check if you're searching in the correct room (if room filter is applied)
- Try removing filters to broaden the search
- Verify your search query is spelled correctly
- Check if the room is encrypted - search in encrypted rooms requires key backup
- Try refreshing and searching again
Profile Update Issues
Problem: Cannot update profile or status message
Solutions:
- Check your internet connection
- Verify you're logged in
- Try refreshing the page/app
- Check if profile changes are saved (may take a moment)
- For avatar URLs, ensure you're using a valid MXC URL (mxc://...) or HTTP URL
Messages Not Sending
Solutions:
- Check your internet connection
- Verify you're logged in
- Check if the room is encrypted and encryption is set up
- Try refreshing the page/app
- Check console for error messages (F12)
Calendar Not Syncing
Solutions:
- Verify Microsoft account is connected
- Check calendar permissions in Microsoft account
- Refresh the calendar view
- Re-authenticate Microsoft account
Calls Not Working
Solutions:
- Allow Permissions:
- Desktop: Check system settings (macOS: System Settings > Privacy & Security; Windows: Settings > Privacy)
- Mobile: Check app permissions in device settings
- Web: Check browser permissions (click lock icon in address bar)
- Parallel video calls (e.g. Microsoft Teams + Sparks on Windows): camera is often exclusive — see Parallel meeting apps
- Check your internet connection
- Verify audio/video devices are working
- Desktop: Restart the app if permissions were just granted
- Mobile: Force close and reopen the app
- Web: Refresh the page
- Try a different device to isolate the issue
"Copy to Microsoft failed" (Tab Kontakte / Bereich Personen)
Problem: When you use Copy to Microsoft in the phone book (to save a contact to your Microsoft/Outlook account), a dialog appears: "Copy to Microsoft failed" (or "Kopieren zu Microsoft fehlgeschlagen").
What this means: The contact could not be saved to your Microsoft account because the app does not yet have permission to create or change contacts there. Microsoft is refusing the request (you may see technical messages like "not allowed" or "403").
What you can do:
- Sign out of Microsoft in the app (via your profile or account settings).
- Sign in again with your Microsoft account.
- When Microsoft asks for permissions, allow the app to "Read and write your contacts" (Contacts.ReadWrite).
Work or school accounts: If you use a Microsoft work or school account, your IT administrator may need to approve this permission for the app first. In that case, contact your administrator or try again later.
Other errors: If the message is different (e.g. network error or "service unavailable"), try again later, check your internet connection, or sign out of Microsoft and sign in again.
Performance Issues
Solutions:
- Close unused rooms/conversations
- Clear Cache:
- Desktop: Clear app data in settings or reinstall
- Mobile: Clear app cache in device settings
- Web: Clear browser cache and cookies
- Restart the application
- Check available system resources (RAM, storage)
- Disable unnecessary features in settings
- Desktop: Check for app updates
- Mobile: Ensure sufficient storage space
- Web: Try a different browser or disable extensions
End of User Manual
For the latest updates and additional documentation, check the application's documentation files.